Software Application Development
This page walks through Software Application Development on the prebuilt EDF image: package management, toolchain installation, application and kernel module development on target, and the SDK-based cross-development equivalent. See Development Flows for how this persona fits with the others.
Software Application Development on Target
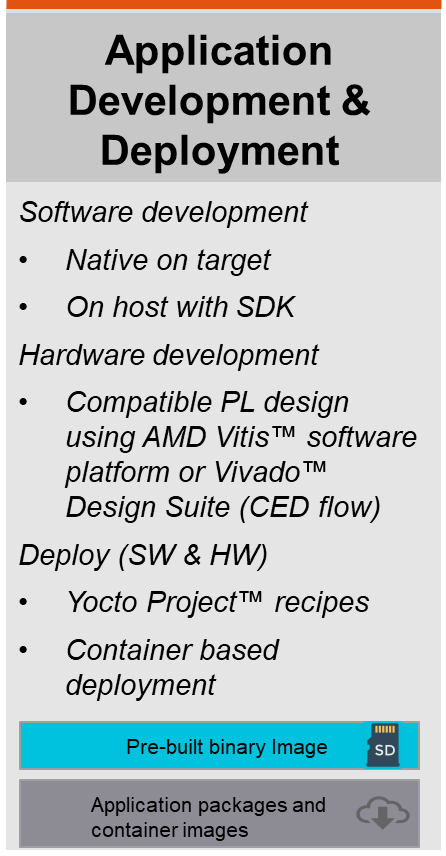
Application Development and Deployment persona summary card.
On-target development is convenient because you can use native compilers and tools and a workflow most developers are used to similar to doing native x86 development on a workstation. You can install a rich set of dev packages from the package feed and use familiar build systems like make, autotools, cmake, or meson without having to set up a cross-development environment.
Package Management Using RPM
Update for EDF v26.06 - AMD Vivado Design Suite 2026.1
This flow is supported as an online flow
Prior release (EA) - The Package feed required for this section was only supported as an offline flow for Early access. see Accessing the package feed without an online network connection
A package manager and package feed is a convenient way of installing additional packages into your root filesystem. dnf (Danified Packaging) is the default runtime package manager. The package management feature is enabled in the general purpose Linux filesystem.
The following is an example to update, search, and install the packages using the network-hosted package feed.
amd-edf:~$ sudo dnf update
amd-edf:~$ dnf search <package-name>
amd-edf:~$ sudo dnf install <package-name>
Accessing the Package Feed Without an Online Network Connection
If you do not have online network access, you can download a copy of the package feed, then copy and unpack the contents to a USB flash drive on your host PC so that you can use the package feed offline. After preparing the flash drive, plug it into the evaluation board and follow the steps in the following section.
AMD EDF v26.06 (VEK385) and Vivado Design Suite 2026.1
It is recommended to use the online package feed available with EDF v26.06.
An updated package feed can be generated manually for offline use.
(The offline package feed bundle from the AMD Vivado design suite 2025.1 EA release for VEK385 EA can be downloaded from the VEK385 lounge site [rpmfeed_04121214.tar.gz], but is not necessarily compatible with the latest EDF images)
The following tutorial assumes that your USB flash drive is enumerated as /dev/sda and has one partition /dev/sda1. The enumeration varies depending on the host system and device.
Query the device:
amd-edf:~$ lsblk -S
NAME
    HCTL    TYPE VENDOR  MODEL         REV SERIAL TRAN
sda 0:0:0:0 disk SanDisk Cruzer Blade 1.00        usb
Query partitions:
amd-edf:~$ lsblk
NAME   MAJ:MIN RM  SIZE RO TYPE MOUNTPOINTS
sda      8:0    1 14.9G  0 disk
`-sda1   8:1    1 14.9G  0 part
Mount the partition that contains the extracted package feed:
amd-edf:~$ sudo mount /dev/sda1 /media
Check the directory tree:
amd-edf:~$ tree -L 1 /media
/media/
└── rpm
    ├── aarch64
    ├── all
    ├── amd_cortexa78_mali_common
    ├── any
    ├── armv8a
    ├── armv8a_crc
    ├── cortexa72_cortexa53
    ├── noarch
    └── versal_2ve_2vm_generic
Next, update the DNF repo file to point to the offline package feed file path based on where the USB partition has been mounted, then clean and update the DNF cache.
The default repo file is shown below.
Default RPM repo file
amd-edf:~$ cat /etc/yum.repos.d/oe-remote-repo-sswreleases-amd-edf-26.06-generic-rpm-rpm_latest.repo
[oe-remote-repo-sswreleases-amd-edf-26.06-generic-rpm-rpm_latest-all]
name=OE Remote Repo: sswreleases amd-edf 26.06 generic rpm rpm_latest all
baseurl=https://edf.amd.com/sswreleases/amd-edf/26.06/generic/rpm/rpm_latest/all
gpgcheck=0

[oe-remote-repo-sswreleases-amd-edf-26.06-generic-rpm-rpm_latest-any]
name=OE Remote Repo: sswreleases amd-edf 26.06 generic rpm rpm_latest any
baseurl=https://edf.amd.com/sswreleases/amd-edf/26.06/generic/rpm/rpm_latest/any
gpgcheck=0

[oe-remote-repo-sswreleases-amd-edf-26.06-generic-rpm-rpm_latest-noarch]
name=OE Remote Repo: sswreleases amd-edf 26.06 generic rpm rpm_latest noarch
baseurl=https://edf.amd.com/sswreleases/amd-edf/26.06/generic/rpm/rpm_latest/noarch
gpgcheck=0

[oe-remote-repo-sswreleases-amd-edf-26.06-generic-rpm-rpm_latest-aarch64]
name=OE Remote Repo: sswreleases amd-edf 26.06 generic rpm rpm_latest aarch64
baseurl=https://edf.amd.com/sswreleases/amd-edf/26.06/generic/rpm/rpm_latest/aarch64
gpgcheck=0

[oe-remote-repo-sswreleases-amd-edf-26.06-generic-rpm-rpm_latest-armv8a]
name=OE Remote Repo: sswreleases amd-edf 26.06 generic rpm rpm_latest armv8a
baseurl=https://edf.amd.com/sswreleases/amd-edf/26.06/generic/rpm/rpm_latest/armv8a
gpgcheck=0

[oe-remote-repo-sswreleases-amd-edf-26.06-generic-rpm-rpm_latest-armv8a_crc]
name=OE Remote Repo: sswreleases amd-edf 26.06 generic rpm rpm_latest armv8a_crc
baseurl=https://edf.amd.com/sswreleases/amd-edf/26.06/generic/rpm/rpm_latest/armv8a_crc
gpgcheck=0

[oe-remote-repo-sswreleases-amd-edf-26.06-generic-rpm-rpm_latest-cortexa72_cortexa53]
name=OE Remote Repo: sswreleases amd-edf 26.06 generic rpm rpm_latest cortexa72_cortexa53
baseurl=https://edf.amd.com/sswreleases/amd-edf/26.06/generic/rpm/rpm_latest/cortexa72_cortexa53
gpgcheck=0

[oe-remote-repo-sswreleases-amd-edf-26.06-generic-rpm-rpm_latest-versal_2ve_2vm_generic]
name=OE Remote Repo: sswreleases amd-edf 26.06 generic rpm rpm_latest versal_2ve_2vm_generic
baseurl=https://edf.amd.com/sswreleases/amd-edf/26.06/generic/rpm/rpm_latest/versal_2ve_2vm_generic
gpgcheck=0

[oe-remote-repo-sswreleases-amd-edf-26.06-generic-rpm-rpm_latest-amd_cortexa78_mali_common]
name=OE Remote Repo: sswreleases amd-edf 26.06 generic rpm rpm_latest amd_cortexa78_mali_common
baseurl=https://edf.amd.com/sswreleases/amd-edf/26.06/generic/rpm/rpm_latest/amd_cortexa78_mali_common
gpgcheck=0
Back up the original file:
amd-edf:~$ cp /etc/yum.repos.d/oe-remote-repo-sswreleases-amd-edf-26.06-generic-rpm-rpm_latest.repo ~/
Update baseurl to a local file path:
amd-edf:~$ sudo sed -i 's@https://edf.amd.com/sswreleases/amd-edf/26.06/generic/rpm/rpm_latest@file:///media/rpm@g' /etc/yum.repos.d/oe-remote-repo-sswreleases-amd-edf-26.06-generic-rpm-rpm_latest.repo
Inspect the updated repo file and verify the baseurl was changed as expected:
Updated RPM repo file
amd-edf:~$ cat /etc/yum.repos.d/oe-remote-repo-sswreleases-amd-edf-26.06-generic-rpm-rpm_latest.repo
[oe-remote-repo-sswreleases-amd-edf-26.06-generic-rpm-rpm_latest-all]
name=OE Remote Repo: sswreleases amd-edf 26.06 generic rpm rpm_latest all
baseurl=file:///media/rpm/all
gpgcheck=0

[oe-remote-repo-sswreleases-amd-edf-26.06-generic-rpm-rpm_latest-any]
name=OE Remote Repo: sswreleases amd-edf 26.06 generic rpm rpm_latest any
baseurl=file:///media/rpm/any
gpgcheck=0

[oe-remote-repo-sswreleases-amd-edf-26.06-generic-rpm-rpm_latest-noarch]
name=OE Remote Repo: sswreleases amd-edf 26.06 generic rpm rpm_latest noarch
baseurl=file:///media/rpm/noarch
gpgcheck=0

[oe-remote-repo-sswreleases-amd-edf-26.06-generic-rpm-rpm_latest-aarch64]
name=OE Remote Repo: sswreleases amd-edf 26.06 generic rpm rpm_latest aarch64
baseurl=file:///media/rpm/aarch64
gpgcheck=0

[oe-remote-repo-sswreleases-amd-edf-26.06-generic-rpm-rpm_latest-armv8a]
name=OE Remote Repo: sswreleases amd-edf 26.06 generic rpm rpm_latest armv8a
baseurl=file:///media/rpm/armv8a
gpgcheck=0

[oe-remote-repo-sswreleases-amd-edf-26.06-generic-rpm-rpm_latest-armv8a_crc]
name=OE Remote Repo: sswreleases amd-edf 26.06 generic rpm rpm_latest armv8a_crc
baseurl=file:///media/rpm/armv8a_crc
gpgcheck=0

[oe-remote-repo-sswreleases-amd-edf-26.06-generic-rpm-rpm_latest-cortexa72_cortexa53]
name=OE Remote Repo: sswreleases amd-edf 26.06 generic rpm rpm_latest cortexa72_cortexa53
baseurl=file:///media/rpm/cortexa72_cortexa53
gpgcheck=0

[oe-remote-repo-sswreleases-amd-edf-26.06-generic-rpm-rpm_latest-versal_2ve_2vm_generic]
name=OE Remote Repo: sswreleases amd-edf 26.06 generic rpm rpm_latest versal_2ve_2vm_generic
baseurl=file:///media/rpm/versal_2ve_2vm_generic
gpgcheck=0

[oe-remote-repo-sswreleases-amd-edf-26.06-generic-rpm-rpm_latest-amd_cortexa78_mali_common]
name=OE Remote Repo: sswreleases amd-edf 26.06 generic rpm rpm_latest amd_cortexa78_mali_common
baseurl=file:///media/rpm/amd_cortexa78_mali_common
gpgcheck=0

amd-edf:~$ sudo dnf clean all
[snip]

amd-edf:~$ sudo dnf update
[snip]
Toolchain installation
Update for EDF v26.06 - AMD Vivado Design Suite 2026.1
This flow is supported as an online flow
Prior release (EA) - The Package feed required for this section was only supported as an offline flow for Early Access. see Accessing the package feed without an online network connection
In preparation for doing any on-target development, first install the compiler toolchains and other commonly used development utilities. This can be done by installing the self-hosted package group from the package feed.
Note: The installation step takes a while to complete
amd-edf:~$ sudo dnf install packagegroup-self-hosted
[snip]

amd-edf:~$ gcc -v
Using built-in specs.
COLLECT_GCC=gcc
COLLECT_LTO_WRAPPER=/usr/libexec/gcc/aarch64-amd-linux/13.4.0/lto-wrapper
Target: aarch64-amd-linux
Configured with: ../../../../../../work-shared/gcc-13.4.0-r0/gcc-13.4.0/configure --build=x86_64-linux --host=aarch64-amd-linux --target=aarch64-amd-linux --prefix=/usr --exec_prefix=/usr --bindir=/usr/bin --sbindir=/usr/sbin --libexecdir=/usr/libexec --datadir=/usr/share --sysconfdir=/etc --sharedstatedir=/com --localstatedir=/var --libdir=/usr/lib --includedir=/usr/include --oldincludedir=/usr/include --infodir=/usr/share/info --mandir=/usr/share/man --disable-silent-rules --disable-dependency-tracking --with-libtool-sysroot=/ --with-gnu-ld --enable-shared --enable-languages=c,c++,fortran --enable-threads=posix --enable-multilib --enable-default-pie --enable-c99 --enable-long-long --enable-symvers=gnu --enable-libstdcxx-pch --program-prefix=aarch64-amd-linux- --without-local-prefix --disable-install-libiberty --disable-libssp --enable-libitm --enable-lto --disable-bootstrap --with-system-zlib --with-linker-hash-style=gnu --enable-linker-build-id --with-ppl=no --with-cloog=no --enable-checking=release --enable-cheaders=c_global --without-isl --with-build-sysroot=/ --disable-static --enable-nls --with-glibc-version=2.28 --enable-initfini-array --enable-__cxa_atexit
Thread model: posix
Supported LTO compression algorithms: zlib zstd
gcc version 13.4.0 (GCC)
Software Application Development
In this example you clone, build, and install the example application to test on-target development using common tools:
amd-edf:~$ wget https://ftp.gnu.org/gnu/hello/hello-2.12.tar.gz
--2025-05-08 03:09:51--  https://ftp.gnu.org/gnu/hello/hello-2.12.tar.gz
Resolving ftp.gnu.org... 209.51.188.20, 2001:470:142:3::b
Connecting to ftp.gnu.org|209.51.188.20|:443... connected.
HTTP request sent, awaiting response... 200 OK
Length: 1017723 (994K) [application/x-gzip]
Saving to: 'hello-2.12.tar.gz'

hello-2.12.tar.gz                                   100%[==================================================================================================================>] 993.87K  1.49MB/s    in 0.7s

2025-05-08 03:09:53 (1.49 MB/s) - 'hello-2.12.tar.gz' saved [1017723/1017723]

amd-edf:~$ tar -xf hello-2.12.tar.gz
amd-edf:~$ cd hello-2.12
amd-edf:~/hello-2.12$ ./configure
[snip]

amd-edf:~/hello-2.12$ make -j8
[snip]

amd-edf:~/hello-2.12$ sudo make install
[snip]

amd-edf:~/hello-2.12$ hello
Hello, world!
Kernel Module Development
Update for EDF v26.06 - AMD Vivado Design Suite 2026.1
This flow is supported as an online flow
Prior release (EA) - The Package feed required for this section was only supported as an offline flow for Early access. see Accessing the package feed without an online network connection
Install the kernel-devsrc package which provides the entire kernel source
tree for kernel module development. The resulting sources are installed into
/usr/src/kernel
amd-edf:~$ sudo dnf install kernel-devsrc
[snip]
Prepare the kernel source tree for module build.
Note: the kernel release string shown in this example can be different depending on the exact build/image used.
amd-edf:~$ export LOCALVERSION="-$(uname -r | cut -d'-' -f3)"
amd-edf:~$ echo $LOCALVERSION
-gf28cb5f8491a
amd-edf:~$ export KERNEL_SRC=/usr/src/kernel
amd-edf:~$ cd $KERNEL_SRC

amd-edf:/usr/src/kernel$ make kernelrelease
6.12.40-xilinx-gf28cb5f8491a
Make sure the previous output matches the output of
uname -r:amd-edf:/usr/src/kernel$ uname -r 6.12.40-xilinx-gf28cb5f8491a amd-edf:/usr/src/kernel$ sudo -E make modules_prepare [snip]
For this example, clone the hdmi21-modules repository, then build and
install the module. This example is for illustration only; the compiled
kernel module is not used subsequently.
If you are building your own kernel module, the same steps apply provided your kernel module source tree and Makefile follow the same structure as the provided example.
See https://github.com/Xilinx/hdmi21-modules for the example code.
Clone and build the kernel module on the target
amd-edf:/usr/src/kernel$ cd

amd-edf:~$ git clone https://github.com/Xilinx/hdmi21-modules
Cloning into 'hdmi21-modules'...
remote: Enumerating objects: 26, done.
remote: Counting objects: 100% (26/26), done.
remote: Compressing objects: 100% (15/15), done.
remote: Total 26 (delta 11), reused 26 (delta 11), pack-reused 0 (from 0)
Receiving objects: 100% (26/26), 33.72 KiB | 575.00 KiB/s, done.
Resolving deltas: 100% (11/11), done.

amd-edf:~$ cd hdmi21-modules/
amd-edf:~/hdmi21-modules$ make -j8
make -C /usr/src/kernel M=/home/amd-edf/hdmi21-modules O= modules
make[1]: Entering directory '/usr/lib/modules/6.12.40-xilinx-gf28cb5f8491a/build'
warning: the compiler differs from the one used to build the kernel
  The kernel was built by: aarch64-amd-linux-gcc (GCC) 13.4.0
  You are using:           gcc (GCC) 13.4.0
  CC [M]  /home/amd-edf/hdmi21-modules/xfmc/x_vfmc.o
  CC [M]  /home/amd-edf/hdmi21-modules/xfmc/fmc.o
  CC [M]  /home/amd-edf/hdmi21-modules/xfmc/fmc74.o
  CC [M]  /home/amd-edf/hdmi21-modules/xfmc/fmc64.o
  CC [M]  /home/amd-edf/hdmi21-modules/xfmc/fmc65.o
  CC [M]  /home/amd-edf/hdmi21-modules/xfmc/tipower.o
  CC [M]  /home/amd-edf/hdmi21-modules/xfmc/idt.o
  CC [M]  /home/amd-edf/hdmi21-modules/xfmc/onsemi_tx.o
  CC [M]  /home/amd-edf/hdmi21-modules/xfmc/onsemi_rx.o
  CC [M]  /home/amd-edf/hdmi21-modules/xfmc/ti_tmds1204_tx.o
  CC [M]  /home/amd-edf/hdmi21-modules/xfmc/ti_tmds1204_rx.o
  CC [M]  /home/amd-edf/hdmi21-modules/xfmc/si5344.o
  LD [M]  /home/amd-edf/hdmi21-modules/xfmc/hdmi21-xfmc.o
  MODPOST /home/amd-edf/hdmi21-modules/Module.symvers
  CC [M]  /home/amd-edf/hdmi21-modules/xfmc/hdmi21-xfmc.mod.o
  CC [M]  /home/amd-edf/hdmi21-modules/.module-common.o
  LD [M]  /home/amd-edf/hdmi21-modules/xfmc/hdmi21-xfmc.ko
make[1]: Leaving directory '/usr/lib/modules/6.12.10-xilinx-gf28cb5f8491a/build'

amd-edf:~/hdmi21-modules$ sudo -E make modules_install
make -C /usr/src/kernel M=/home/amd-edf/hdmi21-modules modules_install
make[1]: Entering directory '/usr/lib/modules/6.12.40-xilinx-gf28cb5f8491a/build'
  INSTALL /lib/modules/6.12.40-xilinx-gf28cb5f8491a/updates/xfmc/hdmi21-xfmc.ko
  DEPMOD  /lib/modules/6.12.40-xilinx-gf28cb5f8491a
Warning: modules_install: missing 'System.map' file. Skipping depmod.
make[1]: Leaving directory '/usr/lib/modules/6.12.40-xilinx-gf28cb5f8491a/build'

amd-edf:~/hdmi21-modules$ sudo depmod

amd-edf:~/hdmi21-modules$ ls xfmc/*ko
xfmc/hdmi21-xfmc.ko
You can now inspect your kernel module, load, and unload it as follows. The exact output of the commands shown below can vary based on the kernel version.
Kernel module inspect, load, and unload session
amd-edf:~/hdmi21-modules$ cd
amd-edf:~$ modinfo hdmi21-xfmc
filename:       /lib/modules/6.12.10-xilinx-gf28cb5f8491a/updates/xfmc/hdmi21-xfmc.ko
description:    Xilinx Vphy driver
license:        GPL
license:        GPL v2
description:    FMC Expander driver
license:        GPL v2
description:    FMC74 Expander driver
license:        GPL v2
description:    FMC64 Expander driver
license:        GPL v2
description:    FMC65 Expander driver
license:        GPL v2
description:    TIPOWER Expander driver
license:        GPL v2
description:    8T49N24x ccf driver
license:        GPL v2
description:    ONSEMI NB7NQ621M cable redriver driver
license:        GPL v2
description:    ONSEMI NB7NQ621M cable redriver driver
license:        GPL v2
description:    TI TMDS1204 retimer chip driver
license:        GPL v2
description:    TI TMDS1204 retimer chip driver
license:        GPL
description:    Si5344 driver
alias:          i2c:IDT
alias:          i2c:FMC74
alias:          of:N*T*CvfmcC*
alias:          of:N*T*Cvfmc
alias:          i2c:TIPOWER
alias:          i2c:expander-fmc64
alias:          of:N*T*Cti_tmds1204,ti_tmds1204-rxC*
alias:          of:N*T*Cti_tmds1204,ti_tmds1204-rx
alias:          i2c:ti_tmds1204tx
alias:          i2c:onsemitx
alias:          of:N*T*Consemi,onsemi-rxC*
alias:          of:N*T*Consemi,onsemi-rx
alias:          i2c:FMC
alias:          of:N*T*Cti_tmds1204,ti_tmds1204-txC*
alias:          of:N*T*Cti_tmds1204,ti_tmds1204-tx
alias:          of:N*T*Cexpander-fmcC*
alias:          of:N*T*Cexpander-fmc
alias:          i2c:si5344
alias:          of:N*T*Cexpander-fmc65C*
alias:          of:N*T*Cexpander-fmc65
alias:          i2c:onsemirx
alias:          of:N*T*Csi5344C*
alias:          of:N*T*Csi5344
alias:          of:N*T*Cexpander-fmc74C*
alias:          of:N*T*Cexpander-fmc74
alias:          of:N*T*Cexpander-fmc64C*
alias:          of:N*T*Cexpander-fmc64
alias:          i2c:ti_tmds1204rx
alias:          of:N*T*Cexpander-tipowerC*
alias:          of:N*T*Cexpander-tipower
alias:          of:N*T*Cidt,idt8t49C*
alias:          of:N*T*Cidt,idt8t49
alias:          i2c:expander-fmc65
alias:          of:N*T*Consemi,onsemi-txC*
alias:          of:N*T*Consemi,onsemi-tx
depends:
name:           hdmi21_xfmc
vermagic:       6.12.40-xilinx-gf28cb5f8491a SMP mod_unload aarch64

amd-edf:~$ lsmod
Module                  Size  Used by
xt_conntrack           12288  1
xt_MASQUERADE          12288  1
iptable_nat            12288  1
xt_addrtype            12288  2
iptable_filter         12288  1
cfg80211              385024  0
dma_buf_test_exporter    16384  0
mali_kbase            831488  0
mali_gpu_aw            16384  0
mali_gpu_resource_group    28672  0
mali_arbiter           45056  1 mali_gpu_resource_group
mali_gpu_partition_control    12288  0
mali_gpu_partition_config    12288  0
mali_gpu_assign        16384  0
mali_gpu_system        12288  0
mali_gpu_power         16384  0
zocl                  212992  0
mmi_dptx               36864  0
mmi_dc                 16384  0
mmi_dcdma              16384  6
memory_group_manager    12288  0
uio_pdrv_genirq        12288  0
openvswitch           139264  0
nsh                    12288  1 openvswitch
nf_nat                 40960  3 openvswitch,iptable_nat,xt_MASQUERADE

amd-edf:~$ sudo modprobe hdmi21-xfmc
amd-edf:~$ lsmod
Module                  Size  Used by
hdmi21_xfmc            40960  0
xt_conntrack           12288  1
xt_MASQUERADE          12288  1
iptable_nat            12288  1
xt_addrtype            12288  2
iptable_filter         12288  1
cfg80211              385024  0
dma_buf_test_exporter    16384  0
mali_kbase            831488  0
mali_gpu_aw            16384  0
mali_gpu_resource_group    28672  0
mali_arbiter           45056  1 mali_gpu_resource_group
mali_gpu_partition_control    12288  0
mali_gpu_partition_config    12288  0
mali_gpu_assign        16384  0
mali_gpu_system        12288  0
mali_gpu_power         16384  0
zocl                  212992  0
mmi_dptx               36864  0
mmi_dc                 16384  0
mmi_dcdma              16384  6
memory_group_manager    12288  0
uio_pdrv_genirq        12288  0
openvswitch           139264  0
nsh                    12288  1 openvswitch
nf_nat                 40960  3 openvswitch,iptable_nat,xt_MASQUERADE

amd-edf:~$ sudo modprobe -r hdmi21-xfmc
amd-edf:~$ lsmod
Module                  Size  Used by
xt_conntrack           12288  1
xt_MASQUERADE          12288  1
iptable_nat            12288  1
xt_addrtype            12288  2
iptable_filter         12288  1
cfg80211              385024  0
dma_buf_test_exporter    16384  0
mali_kbase            831488  0
mali_gpu_aw            16384  0
mali_gpu_resource_group    28672  0
mali_arbiter           45056  1 mali_gpu_resource_group
mali_gpu_partition_control    12288  0
mali_gpu_partition_config    12288  0
mali_gpu_assign        16384  0
mali_gpu_system        12288  0
mali_gpu_power         16384  0
zocl                  212992  0
mmi_dptx               36864  0
mmi_dc                 16384  0
mmi_dcdma              16384  6
memory_group_manager    12288  0
uio_pdrv_genirq        12288  0
openvswitch           139264  0
nsh                    12288  1 openvswitch
nf_nat                 40960  3 openvswitch,iptable_nat,xt_MASQUERADE
Development Inside Container
A devtools container image is provided for on-target development inside a container isolated from the host OS. The devtools container image has toolchains and basic developer tools pre-installed. The image has package management enabled and can be extended by installing additional packages from the package feed.
devtools container:
amd-edf:~$ sudo docker pull xilinx/edf:devtools-25.05

amd-edf:~$ sudo docker pull xilinx/edf:hello-world-25.05

amd-edf:~$ sudo docker images
REPOSITORY                                                                   TAG       IMAGE ID       CREATED         SIZE
hub.docker.com/r/xilinx/edf/devtools-25.05        latest    6ec094fb31d2   28 hours ago    425MB
hub.docker.com/r/xilinx/edf/hello-world-25.05     latest    e9fff5795aa2   3 weeks ago     13.4MB

amd-edf:~$ sudo docker run -it hub.docker.com/r/xilinx/edf/devtools-25.05 bash
bash-5.2# gcc -v
Using built-in specs.
COLLECT_GCC=gcc
COLLECT_LTO_WRAPPER=/usr/libexec/gcc/aarch64-amd-linux/13.4.0/lto-wrapper
Target: aarch64-amd-linux
Configured with: ../../../../../../work-shared/gcc-13.4.0-r0/gcc-13.4.0/configure --build=x86_64-linux --host=aarch64-amd-linux --target=aarch64-amd-linux --prefix=/usr --exec_prefix=/usr --bindir=/usr/bin --sbindir=/usr/sbin --libexecdir=/usr/libexec --datadir=/usr/share --sysconfdir=/etc --sharedstatedir=/com --localstatedir=/var --libdir=/usr/lib --includedir=/usr/include --oldincludedir=/usr/include --infodir=/usr/share/info --mandir=/usr/share/man --disable-silent-rules --disable-dependency-tracking --with-libtool-sysroot=/ --with-gnu-ld --enable-shared --enable-languages=c,c++,fortran --enable-threads=posix --enable-multilib --enable-default-pie --enable-c99 --enable-long-long --enable-symvers=gnu --enable-libstdcxx-pch --program-prefix=aarch64-amd-linux- --without-local-prefix --disable-install-libiberty --disable-libssp --enable-libitm --enable-lto --disable-bootstrap --with-system-zlib --with-linker-hash-style=gnu --enable-linker-build-id --with-ppl=no --with-cloog=no --enable-checking=release --enable-cheaders=c_global --without-isl --with-build-sysroot=/ --disable-static --enable-nls --with-glibc-version=2.28 --enable-initfini-array --enable-__cxa_atexit
Thread model: posix
Supported LTO compression algorithms: zlib zstd
gcc version 13.4.0 (GCC)
Type
exitto stop the container:bash-5.2# exit amd-edf:~$To list all containers:
amd-edf:~$ sudo docker ps -a
CONTAINER ID   IMAGE          COMMAND   CREATED             STATUS                         PORTS     NAMES
34c71be1d202   333a4f403bbb   "bash"    45 minutes ago      Exited (0) 33 minutes ago                unruffled_cori
68af55567e65   014d1198c8c8   "hello"   About an hour ago   Exited (0) About an hour ago             charming_faraday
To restart a container and attach the console:
amd-edf:~$ sudo docker start unruffled_cori
amd-edf:~$ sudo docker attach unruffled_cori
bash-5.2#
You can follow the same steps as mentioned in the on-target software application development and kernel module development tutorials in the preceding sections for building inside the container.
Note: Add bind mounts with -v when starting the container to map
directories from the host OS into the container.
Software Application Development using SDK
An SDK for cross-development on an x86 host is useful when you do not have access to a board for on-target development. Depending on the project, it can speed up the build task compared to building on-target. The downside is that the content of the SDK is fixed and it is impossible to install additional dev packages or utilities into an existing SDK whereas on target, packages can be installed from the package feed.
SDK Installation
The EDF Application and Machine SDK script
amd-edf-glibc-x86_64-meta-edf-app-sdk-cortexa72-cortexa53-amd-cortexa78-mali-common-toolchain-<release>-<stamp>.sh
which can be downloaded from the
Downloads and Release Notes is
installed as follows.
After installation, the SDK can be set up by sourcing the environment setup
script. This sets all the required environment variables (CC, CXX,
LD, etc.) required for cross compilation of projects.
Note
If you start a new shell, you need to source the env setup script again in the new shell.
Install Toolchain on host machine:
A newly downloaded SDK needs to be made executable so it can be run. The
following chmod line only needs to be run first after a fresh download.
During installation the SDK installer asks you where you want the SDK to
be installed.
Make sure to choose a location on your system to which you have write
permission. The following example uses /scratch/sdk as the install location.
This location does not necessarily exist on the host system.
After an SDK is installed to a specific location, it cannot simply be moved. It is set up to work from that specific location. To move the SDK to a different location, re-run the install script specifying the new location.
[/scratch]$ chmod +x amd-edf-glibc-x86_64-meta-edf-app-sdk-cortexa72-cortexa53-amd-cortexa78-mali-common-toolchain-25.05+release-S05062043.sh
[/scratch]$ ./amd-edf-glibc-x86_64-meta-edf-app-sdk-cortexa72-cortexa53-amd-cortexa78-mali-common-toolchain-25.05+release-S05062043.sh
AMD Embedded Development Framework Linux distribution SDK installer version 25.05+release-S05062043
===================================================================================================
Enter target directory for SDK (default: /opt/amd-edf/25.05+release-S05062043): sdk
You are about to install the SDK to "/scratch/sdk". Proceed [Y/n]?
Extracting SDK.................................................................................................................................................................................................................................................................................................done
Setting it up...done
SDK has been successfully set up and is ready to be used.
Each time you wish to use the SDK in a new shell session, you need to source the environment setup script e.g.
 $ . /scratch/sdk/environment-setup-cortexa72-cortexa53-amd-linux

[/scratch]$ source sdk/environment-setup-cortexa72-cortexa53-amd-linux
[/scratch]$ export PS1="(sdk)${PS1}"
(sdk)[/scratch]$
If you see the following message when installing the SDK or when sourcing the
environment setup script, run unset LD_LIBRARY_PATH as stated in the message
and rerun the command.
Your environment is misconfigured, you probably need to 'unset LD_LIBRARY_PATH'
but please check why this was set in the first place and that it's safe to unset.
The SDK will not operate correctly in most cases when LD_LIBRARY_PATH is set.
For more references see:
Software Application Development
We can use the same example code as shown in the on-target compilation tutorial.
Note: You have to pass --host=aarch64 to the configure script to
indicate that you are cross-compiling for aarch64
Cross compile example code:
(sdk)[/scratch]$ wget https://ftp.gnu.org/gnu/hello/hello-2.12.tar.gz
--2025-05-08 01:22:40--  https://ftp.gnu.org/gnu/hello/hello-2.12.tar.gz
Resolving ftp.gnu.org (ftp.gnu.org)... 209.51.188.20, 2001:470:142:3::b
Connecting to ftp.gnu.org (ftp.gnu.org)|209.51.188.20|:443... connected.
HTTP request sent, awaiting response... 200 OK
Length: 1017723 (994K) [application/x-gzip]
Saving to: ‘hello-2.12.tar.gz’

hello-2.12.tar.gz                                   100%[==================================================================================================================>] 993.87K   133KB/s    in 6.4s

2025-05-08 01:22:48 (154 KB/s) - ‘hello-2.12.tar.gz’ saved [1017723/1017723]

(sdk)[/scratch]$ tar -xf hello-2.12.tar.gz
(sdk)[/scratch]$ cd hello-2.12/
(sdk)[hello-2.12]$

(sdk)[hello-2.12]$ ./configure --host=aarch64
[snip]

(sdk)[hello-2.12]$ make -j12
[snip]

(sdk)[hello-2.12]$ file hello
hello: ELF 64-bit LSB pie executable, ARM aarch64, version 1 (SYSV), dynamically linked, interpreter /lib/ld-linux-aarch64.so.1, BuildID[sha1]=dbe295a872b578a639907fa8ec500e77aea5bc46, for GNU/Linux 5.15.0, with debug_info, not stripped
The resulting binary can then be copied over to the target system and run.
Note: Use the IP address assigned to your board in the scp command that
follows.
You can query the IP address by running ip a son the target
(sdk)[hello-2.12]$ scp hello amd-edf@192.168.1.214:~/
[snip]
On the target run the compiled binary
amd-edf:~$ ./hello
Hello, world!
Kernel Module Development
The steps are largely analogous to the steps provided for on-target kernel module development.
Note: make sure you source the SDK environment script before you start
First, prepare the kernel sources.
(sdk)[/scratch]$ export KERNEL_SRC=$OECORE_TARGET_SYSROOT/usr/src/kernel
(sdk)[/scratch]$ cd $KERNEL_SRC
(sdk)[kernel]$

(sdk)[kernel]$ export LOCALVERSION="-$(echo System.map* | cut -d'-' -f4)"
(sdk)[kernel]$ echo $LOCALVERSION
-gf28cb5f8491a
(sdk)[kernel]$ make kernelrelease
6.12.10-xilinx-gf28cb5f8491a

(sdk)[kernel]$ make modules_prepare
[snip]
Now clone the example out-of-tree kernel module repository and build the driver module.
Clone and build the kernel module from the SDK
(sdk)[kernel]$ cd /scratch
(sdk)[/scratch]$ git clone https://github.com/Xilinx/hdmi21-modules
Cloning into 'hdmi21-modules'...
remote: Enumerating objects: 26, done.
remote: Counting objects: 100% (26/26), done.
remote: Compressing objects: 100% (15/15), done.
remote: Total 26 (delta 11), reused 26 (delta 11), pack-reused 0 (from 0)
Receiving objects: 100% (26/26), 33.72 KiB | 986.00 KiB/s, done.
Resolving deltas: 100% (11/11), done.
(sdk)[/scratch]$ cd hdmi21-modules/
(sdk)[hdmi21-modules]$

(sdk)[hdmi21-modules (master u=)]$ make -j8
make -C /scratch/sdk/sysroots/cortexa72-cortexa53-amd-linux/usr/src/kernel M=/scratch/hdmi21-modules O= modules
make[1]: Entering directory '/scratch/sdk/sysroots/cortexa72-cortexa53-amd-linux/usr/lib/modules/6.12.10-xilinx-gf28cb5f8491a/build'
  CC [M]  /scratch/hdmi21-modules/xfmc/x_vfmc.o
  CC [M]  /scratch/hdmi21-modules/xfmc/fmc.o
  CC [M]  /scratch/hdmi21-modules/xfmc/fmc74.o
  CC [M]  /scratch/hdmi21-modules/xfmc/fmc64.o
  CC [M]  /scratch/hdmi21-modules/xfmc/fmc65.o
  CC [M]  /scratch/hdmi21-modules/xfmc/tipower.o
  CC [M]  /scratch/hdmi21-modules/xfmc/idt.o
  CC [M]  /scratch/hdmi21-modules/xfmc/onsemi_tx.o
  CC [M]  /scratch/hdmi21-modules/xfmc/onsemi_rx.o
  CC [M]  /scratch/hdmi21-modules/xfmc/ti_tmds1204_tx.o
  CC [M]  /scratch/hdmi21-modules/xfmc/ti_tmds1204_rx.o
  CC [M]  /scratch/hdmi21-modules/xfmc/si5344.o
  LD [M]  /scratch/hdmi21-modules/xfmc/hdmi21-xfmc.o
  MODPOST /scratch/hdmi21-modules/Module.symvers
  CC [M]  /scratch/hdmi21-modules/xfmc/hdmi21-xfmc.mod.o
  CC [M]  /scratch/hdmi21-modules/.module-common.o
  LD [M]  /scratch/hdmi21-modules/xfmc/hdmi21-xfmc.ko
make[1]: Leaving directory '/scratch/sdk/sysroots/cortexa72-cortexa53-amd-linux/usr/lib/modules/6.12.10-xilinx-gf28cb5f8491a/build'

(sdk)[hdmi21-modules (master % u=)]$ ls xfmc/*ko
xfmc/hdmi21-xfmc.ko
You can now copy the generated files to the target through scp.
(sdk)[hdmi21-modules (master % u=)]$ scp xfmc/*.ko amd-edf@192.168.1.214:~/
hdmi21-xfmc.ko
On the target, copy the files to the kernel module directory of the active kernel.
Note: /lib/modules can contain multiple subdirectories for different
kernel versions. Make sure to copy the files to the active kernel
(run uname -r on the target) and also make sure that the version matches the
version in your SDK (output of make kernelrelease on the host)
Install and inspect the kernel module on the target
amd-edf:~$ ls *.ko
hdmi21-xfmc.ko

amd-edf:~$ mkdir -p /lib/modules/$(uname -r)/updates/xfmc
amd-edf:~$ sudo mv *.ko /lib/modules/$(uname -r)/updates/xfmc

amd-edf:~$ ls /lib/modules/$(uname -r)/updates/xfmc
hdmi21-xfmc.ko
amd-edf:~$ sudo depmod

amd-edf:~$ modinfo hdmi21-xfmc
filename:       /lib/modules/6.12.10-xilinx-gf28cb5f8491a/updates/xfmc/hdmi21-xfmc.ko
description:    Xilinx Vphy driver
license:        GPL
license:        GPL v2
description:    FMC Expander driver
license:        GPL v2
description:    FMC74 Expander driver
license:        GPL v2
description:    FMC64 Expander driver
license:        GPL v2
description:    FMC65 Expander driver
license:        GPL v2
description:    TIPOWER Expander driver
license:        GPL v2
description:    8T49N24x ccf driver
license:        GPL v2
description:    ONSEMI NB7NQ621M cable redriver driver
license:        GPL v2
description:    ONSEMI NB7NQ621M cable redriver driver
license:        GPL v2
description:    TI TMDS1204 retimer chip driver
license:        GPL v2
description:    TI TMDS1204 retimer chip driver
license:        GPL
description:    Si5344 driver
alias:          i2c:IDT
alias:          i2c:FMC74
alias:          of:N*T*CvfmcC*
alias:          of:N*T*Cvfmc
alias:          i2c:TIPOWER
alias:          i2c:expander-fmc64
alias:          of:N*T*Cti_tmds1204,ti_tmds1204-rxC*
alias:          of:N*T*Cti_tmds1204,ti_tmds1204-rx
alias:          i2c:ti_tmds1204tx
alias:          i2c:onsemitx
alias:          of:N*T*Consemi,onsemi-rxC*
alias:          of:N*T*Consemi,onsemi-rx
alias:          i2c:FMC
alias:          of:N*T*Cti_tmds1204,ti_tmds1204-txC*
alias:          of:N*T*Cti_tmds1204,ti_tmds1204-tx
alias:          of:N*T*Cexpander-fmcC*
alias:          of:N*T*Cexpander-fmc
alias:          i2c:si5344
alias:          of:N*T*Cexpander-fmc65C*
alias:          of:N*T*Cexpander-fmc65
alias:          i2c:onsemirx
alias:          of:N*T*Csi5344C*
alias:          of:N*T*Csi5344
alias:          of:N*T*Cexpander-fmc74C*
alias:          of:N*T*Cexpander-fmc74
alias:          of:N*T*Cexpander-fmc64C*
alias:          of:N*T*Cexpander-fmc64
alias:          i2c:ti_tmds1204rx
alias:          of:N*T*Cexpander-tipowerC*
alias:          of:N*T*Cexpander-tipower
alias:          of:N*T*Cidt,idt8t49C*
alias:          of:N*T*Cidt,idt8t49
alias:          i2c:expander-fmc65
alias:          of:N*T*Consemi,onsemi-txC*
alias:          of:N*T*Consemi,onsemi-tx
depends:
name:           hdmi21_xfmc
vermagic:       6.12.10-xilinx-gf28cb5f8491a SMP mod_unload aarch64
QEMU Based Development
The SDK also includes QEMU and QEMU helper scripts that enable full system emulation. The same boot artifacts and disk image that are used to boot on hardware can also be used to boot on QEMU.
The following tutorial shows how to boot the prebuilt images on QEMU using the runqemu helper script from the installed SDK.
Note
Make sure you source the SDK environment script before you start.
Getting Started: Downloading and Combining Artifacts
The SDK includes four utilities used to set up and launch QEMU emulation:
runqemuThe Yocto Project script for launching QEMU system emulation. It reads a
qemuboot.conffile to configure the emulated machine and launches the appropriate QEMU binary with the correct arguments. See the Yocto Project QEMU documentation for full upstream usage details, and runqemu in the Common Specifications reference for AMD-specificqemuboot.confvariables and usage.qemu-system-amd-fpga-multiarchAn AMD FPGA boot orchestrator that emulates the on-chip-loader behavior of AMD FPGA SoCs. It parses and extracts the boot.bin, loads firmware components to the correct memory addresses, and launches the appropriate QEMU sub-processes (APU, PMU/PLM, and ASU depending on the SoC). It is invoked automatically by
runqemuthrough theqb_system_namesetting in theqemuboot.conffile. See qemu-system-amd-fpga-multiarch in the Common Specifications reference for full argument documentation and per-SoC emulation behavior.qemuboot-toolAn AMD tool that is used to manipulate and combine qemuboot.conf files. It is used to merge the machine-specific firmware configuration with the common machine disk image configuration into a single combined
qemuboot.confthatrunqemucan consume. See qemuboot-tool in the Common Specifications reference for full command documentation and examples.wicThe Yocto Project image partitioning tool. In the context of QEMU, it is used to inspect and modify the contents of disk image partitions – in particular, to copy a
boot.bininto the FAT boot partition of a.wic.qemu-sdimage for boards that boot from SD card. See the Yocto Project wic documentation for full usage details.
Before running, you need to combine the machine-specific artifacts (qspi/ospi, boot.bin, qemuboot.conf) with the common machine artifacts (disk image, kernel, qemuboot.conf).
Install the SDK and source its environment setup script (see SDK Installation).
Obtain the machine artifacts from the Downloads and Release Notes page or from your Yocto build output. Copy them into a working directory:
[/scratch]$ mkdir -p qemu-work && cd qemu-work
[qemu-work]$ cp -r /path/to/machine-artifacts/* .
[qemu-work]$ cp -r /path/to/common-machine-artifacts/* .
Machine artifacts include the board-specific
BOOT-<machine>.bin,BOOT-<machine>.qemuboot.conf,qemu-ospi-<machine>.binorqemu-qspi-<machine>.bin, and theqemu-hw-devicetrees/directory. Common machine artifacts include the disk image (edf-linux-disk-image-<common-machine>.rootfs.wic.*) andedf-linux-disk-image-<common-machine>.rootfs.qemuboot.conf.Combine the qemuboot.conf files using
qemuboot-tool:[qemu-work]$ qemuboot-tool \ load BOOT-<machine>.qemuboot.conf \ remove image_link_name \ remove image_name \ merge edf-linux-disk-image-<common-machine>.rootfs.qemuboot.conf \ > combined.qemuboot.conf
Note
For boards that boot from SD card (for example, vck190, zcu102), the boot.bin must also be copied into the FAT partition of the disk image:
[qemu-work]$ wic cp BOOT-<machine>.bin \
    edf-linux-disk-image-<common-machine>.rootfs.wic.qemu-sd:1/boot.bin
Running QEMU With runqemu
With a combined qemuboot.conf in your working directory, start QEMU:
[qemu-work]$ runqemu combined.qemuboot.conf nographic slirp
The runqemu script reads the combined configuration and launches the
appropriate QEMU instances for the target architecture. Booting to the Linux
login prompt typically takes several minutes.
Common runqemu arguments:
Argument |
Description |
|---|---|
|
Disable video console; use serial output on stdio (recommended) |
|
Use user-mode networking – no root privileges required; SSH available
on host port 2222 ( |
|
Do not write changes back to the disk image (useful for repeated testing) |
|
Pass additional arguments directly to QEMU (for example,
|
To exit your QEMU session, press Ctrl+A followed by X.
Configuring the Serial Port
By default, runqemu connects the Linux console serial port to the
terminal. The qb_opt_append entry in the board’s qemuboot.conf
file controls the -serial argument sequence. To display a different
serial port, open the qemuboot.conf in a text editor and
modify the -serial entries in qb_opt_append, replacing
mon:stdio with null at the current position and placing
mon:stdio at the index of the desired port.
Caution
Do not modify qb_serial_opt for this purpose. That field
specifies additional optional serial port devices and is not used
by AMD EDF. Serial port mapping must be configured through
qb_opt_append.
For a detailed explanation of how to determine the correct -serial
mapping from the QEMU hardware device tree and the domain device tree,
see Serial Port Configuration in the
Common Specifications reference.
The qemu-serial-port-tool SDK helper automates the entire
mapping. Point it at the board’s qemuboot.conf plus the relevant
domain device tree and it prints the -serial sequence to drop
into qb_opt_append:
$ qemu-serial-port-tool BOOT-<machine>.qemuboot.conf \
     --domain dts/<machine>/<domain>.dts --stdout
See Automating the Mapping with qemu-serial-port-tool for the full set of options and a worked VEK385 example.
Examples
VEK385 (Versal Gen 2, OSPI boot)
The following shows a complete example for the VEK385 board using prebuilt artifacts from the Lounge or Yocto build output.
Download or locate the artifacts for
versal-2ve-2vm-vek385-sdt-seg(machine) andamd-cortexa78-mali-common(common machine).Combine the artifacts:
[qemu-work]$ qemuboot-tool \
    load BOOT-versal-2ve-2vm-vek385-sdt-seg.qemuboot.conf \
    remove image_link_name \
    remove image_name \
    merge edf-linux-disk-image-amd-cortexa78-mali-common.rootfs.qemuboot.conf \
    > combined.qemuboot.conf
Launch QEMU:
[qemu-work]$ runqemu combined.qemuboot.conf nographic slirp
This command launches three separate QEMU instances:
PMXC: runs the PLM (Platform Loader and Manager) on MicroBlaze
APU: runs TF-A, U-Boot, and Linux on Cortex-A78
Booting to the Linux login prompt takes approximately 5-10 minutes. Log in with the default username
amd-edf.
ZCU102 (ZynqMP, SD Boot)
For boards using SD boot mode, boot.bin must also be placed in the disk image:
[qemu-work]$ qemuboot-tool \
    load BOOT-zynqmp-zcu102-sdt-full.qemuboot.conf \
    remove image_link_name \
    remove image_name \
    merge edf-linux-disk-image-amd-cortexa53-mali-common.rootfs.qemuboot.conf \
    > combined.qemuboot.conf
[qemu-work]$ wic cp BOOT-zynqmp-zcu102-sdt-full.bin \
    edf-linux-disk-image-amd-cortexa53-mali-common.rootfs.wic.qemu-sd:1/boot.bin
[qemu-work]$ runqemu combined.qemuboot.conf nographic slirp
ZynqMP: FSBL vs PMU Boot Mode
ZynqMP QEMU emulation supports two boot flows:
FSBL Boot Flow
The FSBL is loaded from the boot.bin and executes on the APU, loading PMU firmware, TF-A, and subsequent software in the same way as real hardware. This is the recommended mode for validating software that depends on FSBL initialization. However, the FSBL boot can freeze due to lack of specific hardware in the emulation environment.
To use FSBL boot, pass -boot fsbl through qemuparams:
[qemu-work]$ runqemu combined.qemuboot.conf nographic slirp \
    qemuparams="-boot fsbl"
PMU Boot Mode
The PMU firmware and TF-A are loaded directly to memory, bypassing the FSBL. Use this mode if the FSBL causes hangs during emulation – some hardware initialization sequences in FSBL are not compatible with all QEMU configurations.
This is the default boot mode, but does not execute the FSBL.
The qemuboot.conf Kernel Argument
Regardless of the -boot mode, the boot.bin provided as the kernel
(qb_default_kernel) is verified against the contents extracted from
the disk image or SPI flash. Pass qemuparams="-nokernel" to
disable this validation if needed.
The validation is in place to help make sure the boot.bin you intend to use is the one actually being booted. The QEMU emulation uses the boot.bin from the disk image or SPI flash.
Bare-Metal Application Emulation
QEMU can emulate bare-metal applications running directly on the Cortex-A or Cortex-R cores with or without Linux. The boot.bin is the primary mechanism for loading bare-metal applications – the PLM (or emulated load on ZynqMP/Zynq) extracts and executes the bare-metal ELF from the boot.bin, exactly as on real hardware.
High-level steps:
Build your bare-metal application ELF for the target core (Cortex-A and/or Cortex-R). The Yocto Project multiconfig flow or Vitis can be used.
Edit the BIF file (
bootgen.bif) from theboot.bin-extracteddirectory in your machine artifacts and replace or add the bare-metal ELF in the appropriate image section. Then regenerate the boot.bin withbootgen.Update the boot image referenced by QEMU. For OSPI-boot boards (for example, VEK385), write the new boot.bin to the OSPI image:
[qemu-work]$ dd if=boot.bin of=qemu-ospi-<machine>.bin conv=notrunc
For SD-boot boards (for example, vck190, zcu102), copy boot.bin into the disk image FAT partition and update the standalone boot file:
[qemu-work]$ cp boot.bin BOOT-<machine>.bin
[qemu-work]$ wic cp BOOT-<machine>.bin \
    edf-linux-disk-image-<common-machine>.rootfs.wic.qemu-sd:1/boot.bin
Launch QEMU as normal. For pure bare-metal (no Linux rootfs needed), you can boot directly from the OSPI/QSPI qemuboot.conf (OSPI/QSPI-boot boards) or a minimal
qemu-image-emptydisk image (SD-boot boards):OSPI boot boards:
[qemu-work]$ runqemu nographic slirp qemu-ospi-<machine>.qemuboot.conf
SD boot boards:
[qemu-work]$ runqemu nographic slirp \
    qemu-image-empty-<machine>.rootfs.qemuboot.conf
Note
The boot.bin passed as qb_default_kernel is validated against the
contents extracted from the OSPI/SD image. If they do not match, QEMU
reports an error. Pass qemuparams="-nokernel" to skip this check.