Application Deployment Using Yocto Recipes AMD Versal Device Portfolio
This page walks through Application Deployment Using Yocto Recipes on the AMD Versal device portfolio: packaging applications, kernel drivers and modules, PL PDI and device-tree firmware bundles, and container images for either image-build integration or over-the-air updates against a running EDF system. See Development Flows for how this persona fits with the others.
Application Deployment using Yocto Recipes
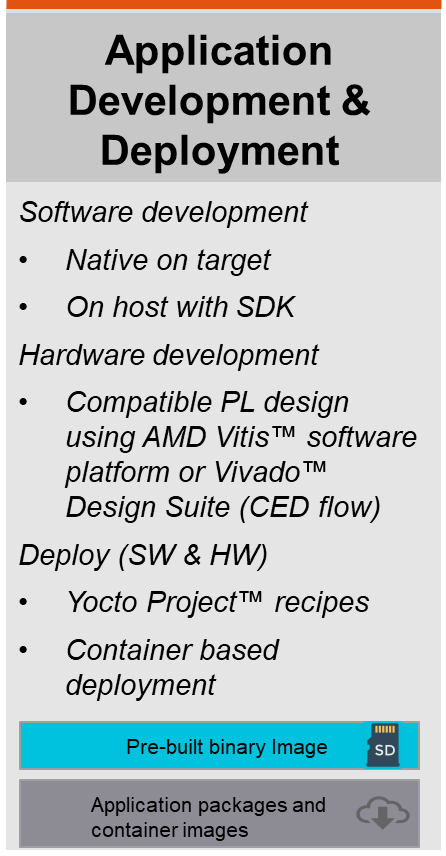
Application Development and Deployment persona summary card.
Software Application Deployment
This section describes building a simple “hello world” application using a basic Yocto recipe.
Build the Yocto pre-requisites by following Operating System Integration and Development AMD Versal device portfolio
See also Development Flows
The following example is based on the hello-single example from meta-skelaton provided by the Yocto project.
Copy the required files to
sources/meta-amd-edf/recipes-apps/hello-simple- the source files could easily be moved to an external or local Git repo and cloned before they are built.File structure:
/scratch/edf/sources/meta-amd-edf/recipes-apps/hello-simple $ tree
.
├── files
│  ├── hello-simple.c
│  └── Makefile
└── hello-simple_1.0.bb
helloworld.c:#include <stdio.h> int main(void) { printf("Hello simple world!\n"); }
Makefile:Note: in a Makefile, the indented lines must use a real tab and not a set of space characters!.PHONY: all install clean ALL = hello-simple all: $(ALL) install: $(ALL) mkdir -p $(DESTDIR)/usr/bin cp $(ALL) $(DESTDIR)/usr/bin clean: -$(RM) $(ALL) *.o
hello-simple_1.0.bb:DESCRIPTION = "Simple helloworld application" SECTION = "examples" LICENSE = "MIT" LIC_FILES_CHKSUM = "file://${COMMON_LICENSE_DIR}/MIT;md5=0835ade698e0bcf8506ecda2f7b4f302" SRC_URI = "file://hello-simple.c file://Makefile" S = "${WORKDIR}" EXTRA_OEMAKE = "DESTDIR=${D}" do_install() { oe_runmake install }
Add the recipe to the image as shown in the following snippet - the GP Linux image can be found in
sources/meta-amd-edf/recipes-extended/\.bb*local.conf:Note: the space before the word ‘hello’ is significant
IMAGE_INSTALL:append = " hello-simple"
To make the new application available on the system, rebuild the wic image and flash the SD card again, or possibly copy the resulting .rpm file to a running system.
On the running system the compiled binary can be found in the configured directory
rootfs:
/usr/bin/hello-simple
An example recipe for the autotools-based hello world application that we have compiled previously on target or using the application SDK can be found here https://web.git.yoctoproject.org/poky/plain/meta-skeleton/recipes-skeleton/hello-autotools/hello_2.10.bb
Kernel Module
This section describes building a simple kernel module using a basic Yocto recipe.
For this example, we are writing a Yocto recipe for the same HDMI kernel module that we used in previous tutorials for the on-target and SDK-based development flow. The same template can be used for your own kernel module.
Build Yocto pre-requisites by following Operating System Integration and Development AMD Versal device portfolio
Create a new recipe ‘kernel-module-hdmi-test.bb’ and place it under ‘meta-amd-edf/recipes-kernel/hdmi-test’. The result looks similar to the following:
SUMMARY = "Xilinx HDMI 2.1 FMC linux kernel module"
DESCRIPTION = "Out-of-tree HDMI 2.1 FMC kernel modules provider for aarch64 devices"
SECTION = "kernel/modules"
LICENSE = "GPL-2.0-only"
LIC_FILES_CHKSUM = "file://LICENSE.md;md5=eb723b61539feef013de476e68b5c50a"

inherit module

S = "${WORKDIR}/git"

SRC_BRANCH = "master"
SRC_URI = "git://github.com/Xilinx/hdmi21-modules.git;protocol=https;branch=${SRC_BRANCH}"
SRCREV = "089a930c5aef4ac7d3be59bbe55e6a270db1da68"

INHIBIT_PACKAGE_STRIP = "1"
Add the recipe to the image as shown in the following snippet.
local.conf:IMAGE_INSTALL:append = " kernel-module-hdmi-test"
After images are built, kernel module files are installed on target_rootfs:
rootfs:
/lib/modules/6.12.10-xilinx-gf28cb5f8491a/updates/xfmc/hdmi21-xfmc.ko
Firmware Bundle
This section describes how to create a simple firmware Yocto recipe.
Refer to the Custom Hardware Development AMD Versal device portfolio tutorial for generating the firmware artifacts used in this tutorial with Vivado
Build Yocto pre-requisites by following Operating System Integration and Development AMD Versal device portfolio
Create the recipes-firmware directory in the meta layer and copy the *_pld.pdi, .dtsi/dtbo, .json and .xclbin (optional) files to these directories.
mkdir:
$ mkdir -p <meta-layer>/recipes-firmware/<recipes-firmware-app>/files
$ cp -r <path-to-files>/*.{bit or bin or pdi, dtsi or dtbo, shell.json or accel.json and .xclbin} <meta-layer>/recipes-firmware/<firmware-app-name>/files
Now create the recipes for flat or static or partial firmware using recipetool.
recipetool-create:$ recipetool create -o <meta-layer>/recipes-firmware/<firmware-app-name>/firmware-app-name.bb file:///<meta-layer>/recipes-firmware/<firmware-app-name>/files
Modify the recipe and inherit the dfx_user_dts bbclass as shown in the following snippet.
recipetool-create:SUMMARY = "<firmware-app-name> Segemented Configuration(DFx Full) firmware using dfx_user_dts bbclass" DESCRIPTION = "<firmware-app-name> Segemented Configuration(DFx Full) firmware application" LICENSE = "MIT" LIC_FILES_CHKSUM = "file://${COMMON_LICENSE_DIR}/MIT;md5=0835ade698e0bcf8506ecda2f7b4f302" inherit dfx_user_dts SRC_URI = "\ file://shell.json \ file://<design_name>_pld.pdi \ file://pl.dtsi \ " COMPATIBLE_MACHINE:<machine-name> = "${MACHINE}"
Note: Instead of dtsi, you can alternatively provide a compiled dtbo file
Add the firmware-recipe app to the image as shown in the following snippet.
local.conf:Note: the space before the word ‘firmware’ is significantIMAGE_INSTALL:append = " firmware-app-name"
After images are built, the firmware app files are installed on target_rootfs.
rootfs:
/lib/firmware/xilinx/firmware-app-name
Deploying a Container Image - Hello World Example
This section describes how to create a simple container image Yocto recipe which can be uploaded to a container registry or copied to a running system.
The following “hello world“ example is based on the container-app-hello-world recipe from the meta-amd-edf layer. It builds on top of the container-app-base recipe from the meta-virtualization layer.
require recipes-extended/images/container-app-base.bb

# Hello world example from meta-skeleton
CONTAINER_APP = " hello"

CONTAINER_APP_CMD = "hello"
CONTAINER_APP lists the recipes to install in the container.
CONTAINER_APP_CMD is the (default) binary which the container runtime
executes when the container is run. This binary needs to be provided by one of
the packages listed under CONTAINER_APP. For an interactive container, set
this to “sh” or similar (the default can be overwritten later).
Build:
To build the container image, run the following bitbake command. Set the MACHINE value to the desired target machine
$ MACHINE=amd-cortexa78-mali-common bitbake container-app-hello-world
The output can be found in the tmp/deploy/image/<MACHINE> folder, e.g.
build/tmp/deploy/images/amd-cortexa78-mali-common $ ls -l
<snip>
lrwxrwxrwx    - user 18 Nov 17:12 container-app-hello-world-latest-oci -> container-app-hello-world-amd-cortexa78-mali-common.rootfs-20241118170958.rootfs-oci
lrwxrwxrwx    - user 18 Nov 17:12 container-app-hello-world-latest-oci-dir.tar -> container-app-hello-world-amd-cortexa78-mali-common.rootfs-20241118170958.rootfs-oci-dir.tar
lrwxrwxrwx    - user 18 Nov 17:12 container-app-hello-world-latest-oci.tar -> container-app-hello-world-amd-cortexa78-mali-common.rootfs-20241118170958.rootfs-oci.tar
<snip>
The container image can either be pushed to a container registry such as
dockerhub using a tool such as skopeo https://github.com/containers/skopeo
(out of scope for this document) or the resulting rootfs tar ball can be copied
to the target and imported using the docker command line.
Import a container image without a registry:
To get the full functionality from container images, upload them to a registry such as dockerhub, as discussed previously. Alternatively, it is possible to copy the container image roofs to the host and run it as an image without relying on a registry. This can simplify the process of working with container images but comes at the cost of reduced functionality. By design, docker does not support directly importing OCI containers (the format generated by Yocto) on the command line as they only support importing containers in the docker format.
It is possible to directly import a generated rootfs (tar.bz2) into docker and
run it as a container - the caveat is that this does not contain any of the
metadata (information or settings) that is stored in the container. For example,
one known issue is that the container entry point is not available this way. You
have to specify the entry point as part of the docker run command yourself.
Also, the repository and tag fields are not populated when listing
docker images. You have to pass the image ID to the run command instead of
the name.
The generated rootfs can be found in tmp/deploy/images/<MACHINE> and should
be scp’ed to the running system before being imported and run with docker. On
the target, run the following commands:
amd-edf:~$ bunzip2 ./container-app-hello-world-amd-cortexa78-mali-common.rootfs-20241113140349.tar.bz2

amd-edf:~$ sudo docker import container-app-hello-world-amd-cortexa78-mali-common.rootfs-20241113140349.tar
sha256:eaa826f05183f70b927a1245219f7f1ea0d89ebe6468ba91cb41e3c8795ac9ce

amd-edf:~$ sudo docker images
REPOSITORY   TAG       IMAGE ID       CREATED          SIZE
<none>       <none>    eaa826f05183   10 seconds ago   4.29MB

amd-edf:~$ sudo docker run -it eaa826f05183 hello
Hello, world!