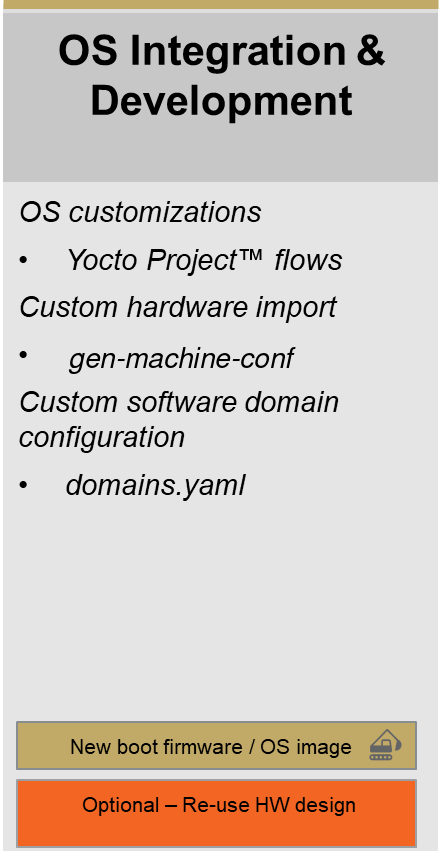
Operating System Integration and Development
This page walks through Operating System Integration and Development: the full EDF software build flow with the Yocto Project, from build setup through Linux disk image, QEMU images, and an SDK for cross-development. See Development Flows for how this persona fits with the others.
Some prompts on this page use exact steps for specific boards. If your specific board is not mentioned you can look at the following information to verify your board is supported for the flow described here, and how to modify the examples for your specific board: Common Specifications
Overview
The operating system (OS) developer creates custom OS images based on application or system requirements. In the simplest case, the image is a plain Linux OS image. In more complex scenarios it can involve hypervisors, containers, and multiple OSes based on processing domains (for example, RTOSes and bare-metal components).
It also entails more low-level boot components such as PMU, PLM, and PSM firmware (AMD-specific), U-Boot, Arm TF-A, and OP-TEE. The Yocto Project provides a build environment that allows users to create custom, complex, heterogeneous boot and OS images.
Note
At this point, basic to advanced Yocto knowledge is required, depending on the task you want to perform.
OS Integration and Development persona, from the AMD EDF persona-based development flows
Yocto Project Build Setup Instructions for EDF
This section describes how to get your build host ready to work with EDF meta layers and the required upstream layers.
Pre-requisites: See Preparing Build Host documentation.
Configure the git settings before you run the
repocommands.$ git config --global user.email "you@example.com" $ git config --global user.name "Your Name"
Make sure the build host shell is
bash, notcshordash.A basic understanding of the Yocto build system is assumed - consult the documentation for further information https://docs.yoctoproject.org/scarthgap/
Download and install the
repotool (if it is not already installed from a previous step).Note
If
repois already installed through a package manager, remove it first; the packaged version is usually out of date and causes issues.Note
curlis used to installrepoand sometimes needs to be installed through the package feed for the host operating system; install it through the host’s package manager (apt-get,dnf,yum, or equivalent) if it is not already present.$ curl https://storage.googleapis.com/git-repo-downloads/repo > repo $ chmod a+x repo $ echo "Create a user specific ~/bin directory if one does not exist" $ mkdir ~/bin $ mv repo ~/bin/ $ PATH=~/bin:$PATH $ repo --help
Initialize the
repoclient.Create the
edfproject directory.$ mkdir -p yocto/edf $ cd yocto/edf
Clone the Yocto meta layer source using the Yocto manifest as shown in the following snippet. A successful initialization ends with a message stating that
repois initialized in your working directory. The working directory now contains a.reposubdirectory whererepocontrol files such as the manifest are stored. There is typically no need to touch this directory directly. To learn more aboutrepo, see https://source.android.com/setup/develop/repo$ repo init -u https://github.com/Xilinx/yocto-manifests.git -b rel-v2026.1 -m default-edf.xml
This is the same
repo initinvocation documented in Setting Up the Yocto Environment; that page also covers the manifest-selection options for the-margument.
Fetch all the repositories.
$ repo sync
Start a branch for development starting from the revision specified in the manifest. This is an optional step.
$ repo start <branch_name> --all
Initialize a build environment using the
edf-init-build-envscript. Once the environment is initialized,bblayers.confandlocal.confare set from themeta-amd-edflayer default templates.$ source edf-init-build-env
If you are building without network access, follow these steps (otherwise skip this step):
Unpack the downloads and sstate tarball files to the
${TOPDIR}/builddirectory:$ tar -xf downloads.tar.gz -C <path-to>/yocto/edf/build $ tar -xf sstate-cache.tar.gz -C <path-to>/yocto/edf/build
Adjust the download (
SOURCE_MIRROR_URL) and sstate (SSTATE_MIRRORS) mirrors variables by editingbuild/conf/local.confto point to local paths as shown in the following snippet.Note
INHERIT += "own-mirrors"is already included in thelocal.conffile.SOURCE_MIRROR_URL = "file:///<path-to>/yocto/edf/build/downloads" SSTATE_MIRRORS = "\ file://.* file:///<path-to>/yocto/edf/build/sstate-cache/PATH \n \ "
Set the
BB_NO_NETWORKvariable inbuild/conf/local.confBB_NO_NETWORK = "1" PREMIRRORS:append = ""
TMPDIRcannot be on NFS. The Yocto Project requiresTMPDIRto live on a filesystem with standard semantics (unique mixed-case names, POSIX file locking, persistent inodes), which NFS does not provide. By defaultTMPDIRisbuild/tmpinside the build directory; if that directory is on NFS, pointTMPDIRat a local disk inbuild/conf/local.conf:TMPDIR = "/tmp/<user-name>/yocto/release_version/build"
See the Yocto Project reference manual entry for TMPDIR for details.
Depending on the build configuration, tens of GB of storage space can be required in
TMPDIR. Make sure plenty of storage space is available. Alternatively, to ease disk usage, add therm_workclass to yourbuild/conf/local.conf:INHERIT += "rm_work"
With
rm_workenabled, the build system deletes each recipe’s per-recipe workspace under${TMPDIR}/workas soon as that recipe’s packages are produced, rather than keeping it for later inspection.Note
If you are modifying and rebuilding source out of a recipe’s
workdirectory,rm_workdiscards those changes. Exempt the affected recipes by listing them inRM_WORK_EXCLUDE, for example:RM_WORK_EXCLUDE += "busybox glibc"
See the Yocto Project reference manual entry for rm_work for details.
EDF Linux Disk Image: Prebuilt Yocto Machine and Vivado Artifacts
See also
Common Specifications for the boot architecture.
AMD Embedded Development Framework (EDF) for the evaluation boards and their default boot modes.
QSPI/OSPI to SD/UFS Boot (Versal Gen 2)
Build Yocto Project pre-requisites by following Yocto Project Build Setup Instructions for EDF
Build the EDF boot firmware (OSPI image)
$ MACHINE=versal-2ve-2vm-vek385-multidomain bitbake edf-ospi
Build the EDF Linux disk image (WIC) containing general-purpose Linux
$ MACHINE=amd-cortexa78-mali-common bitbake edf-linux-disk-image
edf-linux-disk-imageis the Linux-only image. To include Xen and OpenAMP firmware example packages on aarch64, buildedf-platform-disk-imageinstead. See the image-variant comparison.To include OpenAMP auxiliary-processor firmware in an EDF disk image, see Installing OpenAMP Firmware Into EDF Yocto Linux Images.
On successful build, the images for the target machine are available in the relevant output directory:
${TMPDIR}/deploy/images/${MACHINE}/$ ls -la tmp/deploy/images/versal-2ve-2vm-vek385-multidomain/ $ ls -la tmp/deploy/images/amd-cortexa78-mali-common/
Alongside the
edf-ospi-<machine>-<timestamp>.binimage, theedf-ospirecipe also deploys a gzipped copy (.bin.gz) and a JSON manifest (.manifest.json) describing the image metadata, component layout, sizes, and SHA256 hashes for command-line tooling. The same companion artifacts are produced foredf-qspibuilds.Flash the OSPI image at:
${TMPDIR}/deploy/images/versal-2ve-2vm-vek385-multidomain/edf-ospi-versal-2ve-2vm-vek385-multidomain-<timestamp>.binFollow Development Flows.
Flash the disk image at:
${TMPDIR}/deploy/images/amd-cortexa78-mali-common/edf-linux-disk-image-amd-cortexa78-mali-common.rootfs-<timestamp>.wic.xzto the SD card, following Development Flows.
Boot the VEK385 board from OSPI boot mode to boot general-purpose Linux
Upon first boot, Linux requires a password to be set for the default user account. The default username is
amd-edf.
SD Card Boot
Build Yocto Project pre-requisites by following Yocto Project Build Setup Instructions for EDF.
Build the
boot.binimage for the board. See Common Specifications for the list of prebuilt machines that support generating one.The
xilinx-bootbinrecipe builds the image:$ MACHINE=<machine-name> bitbake xilinx-bootbin
For example:
$ MACHINE=versal-vek280-sdt-seg bitbake xilinx-bootbin
$ MACHINE=versal-vck190-sdt-seg bitbake xilinx-bootbin
$ MACHINE=versal-vpk120-sdt-seg bitbake xilinx-bootbin
$ MACHINE=versal-vpk180-sdt-seg bitbake xilinx-bootbin
$ MACHINE=versal-vmk180-sdt-seg bitbake xilinx-bootbin
$ MACHINE=zynqmp-zcu102-sdt-full bitbake xilinx-bootbin
$ MACHINE=zynqmp-zcu104-sdt-full bitbake xilinx-bootbin
$ MACHINE=zynqmp-zcu106-sdt-full bitbake xilinx-bootbin
Alongside the
BOOT-<machine>-<timestamp>.binboot image, thexilinx-bootbinrecipe also deploys a.manifest.jsoncompanion file with a stableboot.bin.manifest.jsonsymlink pointing at the timestamped file. The manifest lists the branch and source revision of each component packaged into the boot image.Build the EDF Common disk image containing the EDF Linux OS (WIC) using the
MACHINEvalue for your target board. See the EDF prebuilt Yocto machine definitions table in the Common Specifications reference for Yocto machine definitions and supported recipes.Syntax:
$ MACHINE=<machine-name> bitbake edf-linux-disk-image
For example:
Linux-only image:
$ MACHINE=amd-cortexa72-common bitbake edf-linux-disk-image
Platform image with Xen and OpenAMP examples:
$ MACHINE=amd-cortexa72-common bitbake edf-platform-disk-image
Linux-only image:
$ MACHINE=amd-cortexa53-mali-common bitbake edf-linux-disk-image
Combine the
xilinx-bootbinand EDF Common disk images into a single SD card image (boot.bin,kernel,rootfs, boot script) by adding theboot.binto the EFI partition of the WIC image (Partition 0 = index 1 in the WIC).The
wictool is available from within the Yocto build environment, but you may need to install additional packages (not included in the Yocto setup):wicusesmcopy, which is provided by themtoolspackage on Canonical Ubuntu (sudo apt install mtools).
Help for
wic:$ wic help
List the partition map of the
.wicfile:$ wic ls tmp/deploy/images/amd-cortexa72-common/edf-linux-disk-image-amd-cortexa72-common.rootfs.wic
$ wic ls tmp/deploy/images/amd-cortexa53-mali-common/edf-linux-disk-image-amd-cortexa53-mali-common.rootfs.wic
For the canonical partition layout (mount points, sizes, and filesystems), see EDF Disk Image Layout.
Show the content of the EFI partition:
$ wic ls tmp/deploy/images/amd-cortexa72-common/edf-linux-disk-image-amd-cortexa72-common.rootfs.wic:1 Volume in drive : is esp Volume Serial Number is 8573-CFCD Directory for ::/ efi <DIR> 2011-04-05 23:00 image 32381440 2011-04-05 23:00 Image loader <DIR> 2011-04-05 23:00 xen cfg 254 2011-04-05 23:00 xen efi 1180456 2011-04-05 23:00 5 files 33 562 150 bytes 1 037 914 112 bytes free
$ wic ls tmp/deploy/images/amd-cortexa53-mali-common/edf-linux-disk-image-amd-cortexa53-mali-common.rootfs.wic:1 Volume in drive : is esp Volume Serial Number is 0B04-E4DA Directory for ::/ No files 535 797 760 bytes free
Copy the
boot.bininto the EFI partition of the WIC image:$ wic cp tmp/deploy/images/versal-vek280-sdt-seg/boot.bin tmp/deploy/images/amd-cortexa72-common/edf-linux-disk-image-amd-cortexa72-common.rootfs.wic:1
$ wic cp \ tmp/deploy/images/zynqmp-zcu104-sdt-full/boot.bin \ tmp/deploy/images/amd-cortexa53-mali-common/edf-linux-disk-image-amd-cortexa53-mali-common.rootfs.wic:1
Check the content of the WIC:
$ wic ls tmp/deploy/images/amd-cortexa72-common/edf-linux-disk-image-amd-cortexa72-common.rootfs.wic:1 Volume in drive : is esp Volume Serial Number is 8573-CFCD Directory for ::/ efi <DIR> 2011-04-05 23:00 image 32381440 2011-04-05 23:00 Image loader <DIR> 2011-04-05 23:00 xen cfg 254 2011-04-05 23:00 xen efi 1180456 2011-04-05 23:00 boot bin 3031696 2025-11-20 15:25 6 files 36 593 846 bytes 1 034 878 976 bytes free
$ wic ls tmp/deploy/images/amd-cortexa53-mali-common/edf-linux-disk-image-amd-cortexa53-mali-common.rootfs.wic:1 Volume in drive : is esp Volume Serial Number is 0B04-E4DA Directory for ::/ boot bin 1850460 2025-11-24 10:03 1 file 1 850 460 bytes 533 946 368 bytes free
Flash the SD card.
The generated image now needs to be flashed to the SD card. Follow the instructions in Discovery and Evaluation.
Once the flashing completes, safely remove the SD card and insert it into the SD card slot of the board.
Boot the board as described in Discovery and Evaluation. The default username is
amd-edf.Warning
For the constraints on booting multiple media that share the same root filesystem PARTUUID, see Root Partition Identification (PARTUUID).
EDF Linux Full Command-Line Image Build Using a Prebuilt Yocto Project Machine
The edf-linux-full-cmdline image is a minimal EDF Linux image
based on core-image-full-cmdline that is sized to fit into RAM.
It is intended for basic testing and debug purposes and is not a production
image.
Use this image when you need a quick, self-contained environment to verify hardware bring-up, run diagnostics, or test peripheral drivers without relying on persistent storage.
The image output is a cpio.gz.u-boot archive that can be loaded directly
into RAM by the bootloader. No SD card or persistent storage is required.
Build Yocto Project pre-requisites by following Yocto Project Build Setup Instructions for EDF.
Build the
edf-linux-full-cmdlineimage using theMACHINEvalue for your target board:$ MACHINE=amd-cortexa78-mali-common bitbake edf-linux-full-cmdline
$ MACHINE=amd-cortexa72-common bitbake edf-linux-full-cmdline
The ZynqMP family ships with two Cortex-A53 multilib tunes -
amd-cortexa53-mali-commonfor boards with the Mali GPU andamd-cortexa53-commonfor boards without it. Pick the one that matches the silicon variant on your board:$ MACHINE=amd-cortexa53-mali-common bitbake edf-linux-full-cmdline $ MACHINE=amd-cortexa53-common bitbake edf-linux-full-cmdline
$ MACHINE=amd-cortexa9thf-neon-common bitbake edf-linux-full-cmdline
On a successful build, the image is in the output directory:
$ ls tmp/deploy/images/<machine>/edf-linux-full-cmdline-<machine>.rootfs.cpio.gz.u-boot
Transfer the
cpio.gz.u-bootimage to the target by using TFTP or a similar method and boot from RAM. The default username isamd-edf.
Building Images for QEMU
The following steps describe how to build and combine the artifacts
required to boot an EDF image in QEMU. For reference
documentation on the tools used (runqemu,
qemu-system-amd-fpga-multiarch, and qemuboot-tool), see
Machine Emulation in
the Common Specifications reference.
Note
On the ZynqMP family the following examples use a ZCU104-based board
design. For other ZynqMP boards, substitute the appropriate
zynqmp-<board>-sdt-full machine name.
Set up the build environment and Yocto Project pre-requisites by following Yocto Project Build Setup Instructions for EDF.
Build the boot image. See Common Specifications for the list of prebuilt machines that support generating one.
The
edf-ospirecipe builds the image:$ MACHINE=<machine-name> bitbake edf-ospi
For example:
$ MACHINE=versal-2ve-2vm-vek385-multidomain bitbake edf-ospi
The
xilinx-bootbinrecipe builds the image:$ MACHINE=<machine-name> bitbake xilinx-bootbin
For example:
$ MACHINE=zynqmp-zcu104-sdt-full bitbake xilinx-bootbin
Build the
qemu-helper-nativepackage to set up QEMU network tap devices.Syntax:
$ MACHINE=<machine-name> bitbake qemu-helper-native
For example:
$ MACHINE=amd-cortexa78-mali-common bitbake qemu-helper-native
$ MACHINE=amd-cortexa53-mali-common bitbake qemu-helper-native
If you do not have sudo permissions on the build host you can skip steps 4 and 5.
Use the
slirpoption if you do not have sudo permissions and tap devices are not enabled on your build host.
Manually configure a tap interface for your build system. As root run
<path-to>/sources/poky/scripts/runqemu-gen-tapdevs, which should generate a list of tap devices. Once the tap interfaces are successfully created, you should be able to see all of the interfaces by running theifconfigorip acommand.$ sudo ./<path-to-layer>/poky/scripts/runqemu-gen-tapdevs $(id -u $USER) $(id -g $USER) 4
Combine the
xilinx-bootbinandqemu-helper-nativeimages to make a singlewic.qemu-sd(boot.bin,kernel,rootfs, boot script), by adding theboot.binto the EFI partition in the WIC image (Partition 0 = index 1 in the WIC).The
wictool is available from within the Yocto build environment, but you may need to install additional packages (not included in the Yocto setup).wicusesmcopy, which is provided by themtoolspackage on Canonical Ubuntu (sudo apt install mtools).
Help for
wic:$ wic help
List the partition map of the
.wicfile:$ wic ls tmp/deploy/images/amd-cortexa78-mali-common/edf-linux-disk-image-amd-cortexa78-mali-common.rootfs.wic.qemu-sd
$ wic ls tmp/deploy/images/amd-cortexa53-mali-common/edf-linux-disk-image-amd-cortexa53-mali-common.rootfs.wic.qemu-sd
For the canonical partition layout (mount points, sizes, and filesystems), see EDF Disk Image Layout.
Show the content of the EFI partition:
$ wic ls tmp/deploy/images/amd-cortexa78-mali-common/edf-linux-disk-image-amd-cortexa78-mali-common.rootfs.wic.qemu-sd:1 Volume in drive : is esp Volume Serial Number is 54BB-997E Directory for ::/ efi <DIR> 2011-04-05 23:00 image 32379392 2011-04-05 23:00 Image loader <DIR> 2011-04-05 23:00 xen cfg 254 2011-04-05 23:00 xen efi 1180456 2011-04-05 23:00 5 files 33 560 102 bytes 1 037 914 112 bytes free
$ wic ls tmp/deploy/images/amd-cortexa53-mali-common/edf-linux-disk-image-amd-cortexa53-mali-common.rootfs.wic.qemu-sd:1 Volume in drive : is esp Volume Serial Number is 0B04-E4DA Directory for ::/ No files 535 797 760 bytes free
Copy the
boot.bininto the EFI partition of the WIC image:$ wic cp \ tmp/deploy/images/versal-2ve-2vm-vek385-multidomain/boot.bin \ tmp/deploy/images/amd-cortexa78-mali-common/edf-linux-disk-image-amd-cortexa78-mali-common.rootfs.wic.qemu-sd:1
$ wic cp tmp/deploy/images/zynqmp-zcu104-sdt-full/boot.bin tmp/deploy/images/amd-cortexa53-mali-common/edf-linux-disk-image-amd-cortexa53-mali-common.rootfs.wic.qemu-sd:1
Check the content of the WIC:
$ wic ls tmp/deploy/images/amd-cortexa78-mali-common/edf-linux-disk-image-amd-cortexa78-mali-common.rootfs.wic.qemu-sd:1 Volume in drive : is esp Volume Serial Number is 54BB-997E Directory for ::/ efi <DIR> 2011-04-05 23:00 image 32379392 2011-04-05 23:00 Image loader <DIR> 2011-04-05 23:00 xen cfg 254 2011-04-05 23:00 xen efi 1180456 2011-04-05 23:00 boot bin 5021072 2025-11-20 15:34 6 files 38 581 174 bytes 1 032 892 416 bytes free
$ wic ls tmp/deploy/images/amd-cortexa53-mali-common/edf-linux-disk-image-amd-cortexa53-mali-common.rootfs.wic.qemu-sd:1 Volume in drive : is esp Volume Serial Number is 0B04-E4DA Directory for ::/ boot bin 1850460 2025-11-24 10:03 1 file 1 850 460 bytes 533 946 368 bytes free
Now you can simulate the image using QEMU emulator.
Note
To terminate QEMU, the usual command is Ctrl+A followed by X.
Create a directory under
${DEPLOY_DIR}/images(tmp/deploy/images) and copy the board and common artifacts into it.$ mkdir -p tmp/deploy/images/vek385-qemu $ cp -r tmp/deploy/images/versal-2ve-2vm-vek385-multidomain/* tmp/deploy/images/vek385-qemu $ cp -r tmp/deploy/images/amd-cortexa78-mali-common/* tmp/deploy/images/vek385-qemu
$ mkdir -p tmp/deploy/images/zcu104-common-qemu-images $ cp -r ./tmp/deploy/images/amd-cortexa53-mali-common/* tmp/deploy/images/zcu104-common-qemu-images/ $ cp -r ./tmp/deploy/images/zynqmp-zcu104-sdt-full/* tmp/deploy/images/zcu104-common-qemu-images/
Merge the board
BOOT-<machine>.qemuboot.confand the commonedf-linux-disk-image-<machine>.rootfs.qemuboot.conffiles into a single combined config using qemuboot-tool.$ ./<path-to>/yocto/edf/sources/meta-xilinx/meta-xilinx-core/scripts/qemuboot-tool \ load tmp/deploy/images/vek385-qemu/BOOT-versal-2ve-2vm-vek385-multidomain.qemuboot.conf \ remove image_link_name \ remove image_name \ merge tmp/deploy/images/vek385-qemu/edf-linux-disk-image-amd-cortexa78-mali-common.rootfs.qemuboot.conf \ > tmp/deploy/images/vek385-qemu/vek385-combined.qemuboot.conf
$ ../sources/meta-xilinx/meta-xilinx-core/scripts/qemuboot-tool \ load tmp/deploy/images/zcu104-common-qemu-images/BOOT-zynqmp-zcu104-sdt-full.qemuboot.conf \ remove image_link_name \ remove image_name \ merge tmp/deploy/images/zcu104-common-qemu-images/edf-linux-disk-image-amd-cortexa53-mali-common.rootfs.qemuboot.conf \ > tmp/deploy/images/zcu104-common-qemu-images/zcu104-common-combined.qemuboot.conf
On a successful merge, the resulting combined
qemuboot.conffile should look similar to the following:$ cat tmp/deploy/images/vek385-qemu/vek385-combined.qemuboot.conf [config_bsp] deploy_dir_image = . image_link_name = edf-linux-disk-image-amd-cortexa78-mali-common.rootfs image_name = edf-linux-disk-image-amd-cortexa78-mali-common.rootfs-20251120145551 kernel_imagetype = Image machine = versal-2ve-2vm-vek385-multidomain qb_cmdline_ip_slirp = ip=dhcp qb_cmdline_ip_tap = ip=192.168.7.@CLIENT@::192.168.7.@GATEWAY@:255.255.255.0::eth0:off:8.8.8.8 net.ifnames=0 qb_default_fstype = wic.ufs qb_default_kernel = BOOT-versal-2ve-2vm-vek385-multidomain.bin qb_drive_type = /dev/sd qb_dtb = qemu-hw-devicetrees/multiarch/board-versal2-psxc-vek385.dtb qb_graphics = qb_kernel_cmdline = none qb_kernel_cmdline_append = swiotlb=0 qb_machine = -machine arm-generic-fdt qb_mem = -m 8G qb_network_device = -net nic,netdev=net0,macaddr=@MAC@ -net nic qb_nfsrootfs_extra_opt = qb_no_pni = net.ifnames=0 qb_opt_append = -serial null -serial null -serial null -serial mon:stdio -nodefaults -boot mode=8 -bootbin versal_2ve_2vm:@DEPLOY_DIR_IMAGE@/qemu-ospi-versal-2ve-2vm-vek385-multidomain.bin -plm-args ' -M microblaze-fdt -device loader,addr=0xf0000000,data=0xba020004,data-len=4 -device loader,addr=0xf0000004,data=0xb800fffc,data-len=4 -device loader,addr=0xF1110624,data=0x0,data-len=4 -device loader,addr=0xF1110620,data=0x1,data-len=4 -hw-dtb @DEPLOY_DIR_IMAGE@/qemu-hw-devicetrees/multiarch/board-versal2-pmxc-virt.dtb -display none ' -asu-args ' -M riscv-fdt -hw-dtb @DEPLOY_DIR_IMAGE@/qemu-hw-devicetrees/multiarch/board-versal2-asu-virt.dtb -display none ' -drive file=@DEPLOY_DIR_IMAGE@/qemu-ospi-versal-2ve-2vm-vek385-multidomain.bin,if=mtd,format=raw,index=0 qb_rng = qb_rootfs = qb_rootfs_extra_opt = qb_rootfs_opt = -device scsi-hd,drive=d1,bus=scsi.0,channel=0,scsi-id=0,lun=0,logical_block_size=4096,physical_block_size=4096 -drive file=@ROOTFS@,if=none,id=d1,format=raw qb_serial_opt = qb_smp = qb_system_name = qemu-system-aarch64-multiarch serial_consoles = 115200;ttyAMA0 staging_bindir_native = ../../../work/x86_64-linux/qemu-helper-native/1.0/recipe-sysroot-native/usr/bin staging_dir_host = ../../../work/versal_2ve_2vm_vek385_sdt_seg-amd-linux/xilinx-bootbin/1.0/recipe-sysroot staging_dir_native = ../../../work/versal_2ve_2vm_vek385_sdt_seg-amd-linux/xilinx-bootbin/1.0/recipe-sysroot-native tune_arch = aarch64 uninative_loader = ../../../sysroots-uninative/x86_64-linux/lib/ld-linux-x86-64.so.2
$ cat tmp/deploy/images/zcu104-common-qemu-images/zcu104-common-combined.qemuboot.conf [config_bsp] deploy_dir_image = . image_link_name = edf-linux-disk-image-amd-cortexa53-mali-common.rootfs image_name = edf-linux-disk-image-amd-cortexa53-mali-common.rootfs-20251121234700 kernel_imagetype = Image machine = zynqmp-zcu104-sdt-full qb_cmdline_ip_slirp = ip=dhcp qb_cmdline_ip_tap = ip=192.168.7.@CLIENT@::192.168.7.@GATEWAY@:255.255.255.0::eth0:off:8.8.8.8 net.ifnames=0 qb_default_fstype = wic.qemu-sd qb_default_kernel = BOOT-zynqmp-zcu104-sdt-full.bin qb_drive_type = /dev/sd qb_dtb = qemu-hw-devicetrees/multiarch/board-zynqmp-zcu104.dtb qb_graphics = qb_kernel_cmdline = none qb_kernel_cmdline_append = swiotlb=0 qb_machine = -machine arm-generic-fdt qb_mem = -m 4G qb_network_device = -net nic -net nic -net nic -net nic,netdev=net0,macaddr=@MAC@ qb_nfsrootfs_extra_opt = qb_no_pni = net.ifnames=0 qb_opt_append = -nodefaults -global xlnx,zynqmp-boot.cpu-num=0 -global xlnx,zynqmp-boot.use-pmufw=true -device loader,addr=0xfffc0000,data=0x584c4e5801000000,data-be=true,data-len=8 -device loader,addr=0xfffc0008,data=0x0000000800000000,data-be=true,data-len=8 -device loader,addr=0xfffc0010,data=0x1000000000000000,data-be=true,data-len=8 -device loader,addr=0xffd80048,data=0xfffc0000,data-len=4,attrs-secure=on -device loader,file=@DEPLOY_DIR_IMAGE@/arm-trusted-firmware.elf,cpu-num=0 -device loader,file=@DEPLOY_DIR_IMAGE@/u-boot.elf -device loader,file=@DEPLOY_DIR_IMAGE@/system.dtb,addr=0x100000,force-raw=on -boot mode=5 -pmu-args ' -M microblaze-fdt -display none -hw-dtb @DEPLOY_DIR_IMAGE@/qemu-hw-devicetrees/multiarch/zynqmp-pmu.dtb -kernel @DEPLOY_DIR_IMAGE@/pmu-rom.elf -device loader,file=@DEPLOY_DIR_IMAGE@/pmu-firmware-zynqmp-zcu104-sdt-full.elf -device loader,addr=0xfd1a0074,data=0x1011003,data-len=4 -device loader,addr=0xfd1a007C,data=0x1010f03,data-len=4 ' qb_rng = qb_rootfs = qb_rootfs_extra_opt = qb_rootfs_opt = -drive if=sd,index=1,file=@ROOTFS@,format=raw qb_serial_opt = qb_smp = qb_system_name = qemu-system-aarch64-multiarch serial_consoles = 115200;ttyPS0 115200;ttyPS1 staging_bindir_native = ../../../work/x86_64-linux/qemu-helper-native/1.0/recipe-sysroot-native/usr/bin staging_dir_host = ../../../work/zynqmp_zcu104_sdt_full-amd-linux/xilinx-bootbin/1.0/recipe-sysroot staging_dir_native = ../../../work/zynqmp_zcu104_sdt_full-amd-linux/xilinx-bootbin/1.0/recipe-sysroot-native tune_arch = aarch64 uninative_loader = ../../../sysroots-uninative/x86_64-linux/lib/ld-linux-x86-64.so.2
Launch the QEMU boot instance by executing the runqemu script.
Booting an EDF machine in QEMU takes several minutes. At multiple points the boot apparently stalls for long periods. On a well-resourced host machine the entire boot to the Linux user-space command line takes over six minutes; getting to QEMU’s
APUline takes around three minutes, at which point it pauses for about two minutes before continuing.$ runqemu tmp/deploy/images/vek385-qemu/vek385-combined.qemuboot.conf nographic slirp
$ runqemu tmp/deploy/images/zcu104-common-qemu-images/zcu104-common-combined.qemuboot.conf nographic slirp
Upon first boot, Linux requires a password to be set for the default user account. The default username is
amd-edf.
Build and Deploy Zephyr RTOS DomU Guest OS Image
A prebuilt Zephyr RTOS Xen DomU Guest OS Image is provided. This
Guest OS uses zephyr-synchronization kernel image. See
Discovery and Evaluation AMD Versal Device Portfolio.
The following tutorial shows how to build and deploy Zephyr RTOS
Guest OS Image.
Set up the build environment and Yocto Project pre-requisites by following Yocto Project Build Setup Instructions for EDF
Use the
xenvmgicv3machine to buildzephyr-synchronizationor another zephyr kernel available in https://github.com/Xilinx/meta-zephyr/tree/rel-v2026.1/meta-zephyr-core/recipes-kernel/zephyr-kernel . See Yocto Project Zephyr BuildCreate a recipe
xen-custom-domu-image$ mkdir -p <meta-custom-layer>/recipes-extended/xen-custom-domu-image $ mkdir -p <meta-custom-layer>/recipes-extended/xen-custom-domu-image/xen-custom-domu-image $ touch <meta-custom-layer>/recipes-extended/xen-custom-domu-image/xen-custom-domu-image.bb
To run the Zephyr RTOS DomU Guest OS, first create the Xen DomU configuration file.
$ touch <meta-custom-layer>/recipes-extended/xen-custom-domu-image/xen-custom-domu-image/zephyr-helloworld-xenvmgicv3.cfg
Content of
<meta-custom-layer>/recipes-extended/xen-custom-domu-image/xen-custom-domu-image/zephyr-helloworld-xenvmgicv3.cfgshould look like below.# Guest name name = "zephyr-helloworld-xenvmgicv3" # Kernel image to boot kernel = "/boot/zephyr-helloworld-xenvmgicv3.bin" # Kernel command line options - Allocate 32MB memory = 32 # Number of VCPUS vcpus = 1
Copy the
zephyr-helloworld-xenvmgicv3.binfile from${TMPDIR}/deploy/images/xenvmgicv3directory to<meta-custom-layer>/recipes-extended/xen-custom-domu-image/xen-custom-domu-image/or host this binary on a web server similar to the layout published under https://edf.amd.com/sswreleases/rel-v2026.1/.$ cp -r ${TMPDIR}/deploy/images/xenvmgicv3/zephyr-helloworld-xenvmgicv3-{TIMESTAMP}.bin <meta-custom-layer>/recipes-extended/xen-custom-domu-image/xen-custom-domu-image/zephyr-helloworld-xenvmgicv3.bin
Now add these files to recipe and deploy to rootfs as shown.
SUMMARY = "Xen Zephyr Hello World DomU Guest OS image recipe" LICENSE = "MIT" LIC_FILES_CHKSUM = "file://${COMMON_LICENSE_DIR}/MIT;md5=0835ade698e0bcf8506ecda2f7b4f302" SRC_URI = "\ file://zephyr-helloworld-xenvmgicv3.bin \ file://zephyr-helloworld-xenvmgicv3.cfg \ " COMPATIBLE_MACHINE = "^$" COMPATIBLE_MACHINE:versal = "${MACHINE}" COMPATIBLE_MACHINE:versal-2ve-2vm = "${MACHINE}" do_configure() { : } do_compile() { : } do_install () { install -d ${D}/boot install -m 0644 ${WORKDIR}/zephyr-helloworld-xenvmgicv3.bin ${D}/boot install -d -m 0755 ${D}${sysconfdir}/xen install -m 0644 ${WORKDIR}/zephyr-helloworld-xenvmgicv3.cfg ${D}${sysconfdir}/xen/zephyr-helloworld-xenvmgicv3.cfg } FILES:${PN} += " \ /boot/* \ ${sysconfdir}/xen/zephyr-helloworld-xenvmgicv3.cfg \ "
Add xen-custom-domu-image recipe to
IMAGE_INSTALLvariable inbuild/conf/local.conffile.IMAGE_INSTALL:append = "xen-custom-domu-image"
Build the
edf-linux-disk-image.$ MACHINE=amd-cortexa72-common bitbake edf-linux-disk-image
$ MACHINE=amd-cortexa78-mali-common bitbake edf-linux-disk-image
See Discovery and Evaluation AMD Versal Device Portfolio on how to run xen domu image.
Building an SDK for Application Cross-Development
A prebuilt SDK for Linux application cross-development is provided. See Software Application Development for instructions on how to use it. An SDK is not extensible; if a user wants to enable additional dev tools or dev packages in the SDK, a new SDK has to be built and installed. The following tutorial shows how to modify and build a new EDF Linux SDK.
Set up the build environment and Yocto Project pre-requisites by following Yocto Project Build Setup Instructions for EDF.
The SDK recipe can be found in
sources/meta-amd-edf/recipes-core/meta/meta-edf-app-sdk.bb.Modify the recipe as needed - for example, append additional recipes to the
TOOLCHAIN_TARGET_TASKlist.Build the SDK using the
MACHINEvalue for your target board:$ MACHINE=amd-cortexa72-common bitbake meta-edf-app-sdk
$ MACHINE=amd-cortexa78-mali-common bitbake meta-edf-app-sdk
$ MACHINE=amd-cortexa53-mali-common bitbake meta-edf-app-sdk
On a successful build, a self-extracting installer is deposited in
tmp/deploy/sdk/:$ ls tmp/deploy/sdk/*.sh tmp/deploy/sdk/amd-edf-glibc-x86_64-meta-edf-app-sdk-<tune>-<machine>-toolchain-<release>+release-<sha>.sh
See Software Application Development for installing the generated SDK and for cross-building an example hello-world application.
Steps to Build Linux Only Images
This section describes how to build a Linux-only EDF boot image on the Versal Gen 2 Mali platform. The flow disables every non-Linux multiconfig target (OP-TEE, Xen, Zephyr, the baremetal Cortex-R52 image) so the resulting boot image carries only the Linux payload. Use this when the production system does not need a hypervisor, secure-world OS, or RPU companion firmware.
Yocto EDF Project Setup Using Repo
Follow the standard
Yocto Project Build Setup Instructions for EDF
to prepare the build host, fetch the manifests with repo init /
repo sync, and source edf-init-build-env. The Linux-only
flow uses the same manifest, the same layers, and the same build
directory layout; only the conf/local.conf adjustments and the
gen-machine-conf configuration differ from a full multidomain
build.
Disable Features Using gen-machine-conf
Open the gen-machine-conf menuconfig:
$ gen-machine-conf parse-sdt \
--template <path-to-machine-template-yaml> \
-c <path-to-conf-dir> \
--menuconfig
In the menu, disable each non-Linux feature:
Under
optee configuration, disable the OP-TEE config option (pressN).Under
Multiconfig Targets:Remove the Xen
.dtsientry (if any) from theDTSI path for linuxoption.Disable
cortexr52-0-zephyr(pressN).Disable
cortexr52-1-baremetal(pressN).
Clear the
Domain file pathvalue: select the option and delete the existing path.
Save the changes and exit the menu.
BitBake Steps
Add the following line to conf/local.conf to mask the
xilinx-bootbin .bbappend that pulls in the
cortexr52-1-baremetal multiconfig:
BBMASK .= "|meta-amd-adaptive-socs-bsp/dynamic-layers/meta-amd-edf/recipes-bsp/bootbin/xilinx-bootbin.bbappend"
The xilinx-bootbin.bbappend recipe pulls in a
hello-world application that depends on the
cortexr52-1-baremetal multiconfig. Because that multiconfig is
disabled in the Linux-only flow, leaving the .bbappend active
leaves an unresolved dependency and causes the
xilinx-bootbin build to fail. Masking it removes the
multiconfig-dependent hello-world from the dependency graph and
lets xilinx-bootbin build successfully.
Run the build:
$ MACHINE=<machine-name> bitbake xilinx-bootbin
On a successful build, the output artifacts are in the deploy
directory for the selected MACHINE (for example,
tmp/deploy/images/versal-2ve-2vm-vek385-revb-sdt-seg/):
BOOT-<machine>-<timestamp>.binand theboot.binsymlink that points at it.arm-trusted-firmware--<version>-<timestamp>.bin/.elf/.uband thearm-trusted-firmware.bin/.elf/.ubsymlinks (also exported asatf-uboot.ub).plm-<machine>.elf,HashBlock0.bin, theCDO/directory and thepmc_cdo.binsymlink, theboot.bin-extracted/staging directory, and theBOOT-<machine>-<timestamp>.qemuboot.confcompanion file.u-boot-<machine>-<version>.bin/.dtb/.elfand the matchingu-boot-nodtb-*artifacts andu-boot.bin/.dtb/.elfsymlinks.u-boot-xlnx-initial-env-<machine>-<version>and.bin, with the same un-versioned symlinks alongside.qemu-ospi-<machine>-<timestamp>.bin(and theqemu-ospi-<machine>.binsymlink) for QEMU runs.A
devicetree/directory plus thesystem-dt-<timestamp>/staging tree, withsystem.dtband<machine>-system-<timestamp>.dtbsymlinks pointing atdevicetree/cortexa78-linux.dtb.base-pdi-unique-id-<machine>-<timestamp>.txt,bootbin-version-header-<machine>-<timestamp>.bin/.manifest/.txt, andbootbin-version-string-<machine>-<timestamp>.txt(each with the matching un-versioned symlink).
The matching prebuilt Platform Disk Image is published in Downloads and Release Notes.
Customizing the Kernel Configuration
The EDF Linux kernel configuration is layered: a Minimal,
Base, or Debug variant on top of xilinx_defconfig, with
optional feature fragments (PCIe NVMe, USB gadget, USB Wi-Fi,
Time-Sensitive Networking) wired in by KERNEL_FEATURES. The
levers - ENABLE_TSN, ENABLE_KERNEL_DEBUG, and the
COMBINED_FEATURES tokens that gate USB gadget and Wi-Fi
support - all live in local.conf or in the machine
configuration. Each lever appends one or more .scc fragments
to KERNEL_FEATURES.
For the per-variant detail, the per-feature wiring with layer
paths (meta-amd-edf, meta-xilinx-tsn, the upstream
Yocto kernel cache), the per-fragment knob attributions, and
the KERNEL_FEATURES:append snippets to enable a single
feature without rebuilding the full set, see
Kernel Configuration Detail.
Editing the RootFS Configuration
Several flows and options exist for editing the rootfs.
See also
Yocto Project customizing-images documentation for the full set of upstream-supported flows.
Extend the existing rootfs and image recipes under
meta-amd-edf/recipes-extended/(for example,edf-linux-disk-imageoredf-linux-full-cmdline).Add additional packages through
conf/local.conf:# Append a package using delayed append (to avoid unintentional effects). IMAGE_INSTALL:append = " openssh"
Use a
.bbappendfile (created in your own layer, added to the build):$ mkdir meta-foo && mkdir recipes-foo $ cd recipes-foo $ vi edf-linux-disk-image.bbappend
IMAGE_INSTALL:append = " openssh"
Add the new layer to
conf/bblayers.conf:BBLAYERS = " \ ... \ <path>/meta-foo \ "
Create your own custom image recipe (and include or run as a build target). Create a new recipe (
.bb) that inherits an existing recipe and includes additional packages, then target the new recipe at build time:require recipes-core/images/your-selected-image.bb
Worked Example
To edit the packages that are installed into the EDF rootfs, follow the steps below. See also the common specification pages to locate the source configuration for the EDF builds: EDF Common Specifications.
Select a predefined image recipe. Start by choosing an existing Yocto image recipe that matches your desired image variant, such as the EDF images in the
meta-amd-edf/recipes-extended/directory. Examples:edf-linux-disk-imageandedf-platform-disk-image, both of which inherit and extendedf-image-common.inc(viaedf-disk-image.inc, which lists the common package set). Then create a custom image recipe in your layer that requires the selected image recipe:require recipes-core/images/your-selected-image.bb
Customize the packages based on machine features. Tailor your custom image recipe to conditionally add, remove, or modify packages based on the target machine’s features. Use
MACHINE_FEATURESandbb.utils.containsto check for specific features and adjust package lists accordingly:IMAGE_INSTALL:append = "${@bb.utils.contains('MACHINE_FEATURES', 'feature-name', ' package-to-add', '', d)}" IMAGE_INSTALL:remove = "${@bb.utils.contains('MACHINE_FEATURES', 'feature-name', ' package-to-remove', '', d)}"
Add custom configurations. In your image recipe or
conf/local.conf, define your custom settings such as user management, package configurations (usingPACKAGECONFIG), custom files, and file permissions.Package groups and layers. Create package groups to manage sets of related packages, and use custom or third-party Yocto layers to incorporate additional software and components matching the desired image type.
Rootfs size and post-processing. Depending on the image variant and machine features, adjust the rootfs size or perform post-processing tasks as needed. Use the
IMAGE_ROOTFS_*variables andROOTFS_POSTPROCESS_COMMANDto manage rootfs configurations.
Customizing the Kernel in Your Yocto Build
The
Customizing the Kernel Configuration
section above describes the EDF-specific kernel feature
levers (KERNEL_FEATURES, ENABLE_TSN,
ENABLE_KERNEL_DEBUG, and the COMBINED_FEATURES tokens).
This section covers the underlying generic Yocto Project patterns
for substituting or extending the kernel .config.
Several flows and options exist for substituting or extending the
kernel .config.
See also
Yocto Project kernel-dev documentation for the full set of upstream-supported flows.
Changing the Configuration covers swapping in a complete
defconfig.Creating Configuration Fragments covers appending
.cfgfragments to the existing config.
Specify a complete new
.configfile to be used in the build. Copy the.configto the recipe (${PN}) directory in your layer’srecipes-kernel/linuxdirectory and rename it todefconfig. Then create alinux-yocto.bbappendin your layer:FILESEXTRAPATHS:prepend := "${THISDIR}/${PN}:" SRC_URI += "file://defconfig"
Append config fragments to the build, extending the existing
.config. Create a config fragment (.cfg) usingmenuconfiganddiffconfig(or manually), then create alinux-yocto.bbappendin your layer to pull in the fragment:FILESEXTRAPATHS:prepend := "${THISDIR}/${PN}:" SRC_URI += "file://<myFragName>.cfg"
Creating a Multi-stage Boot Image (Primary -> Secondary Boot Device)
The EDF default boot architecture uses a two-stage boot.
See also
Common Specifications for the boot architecture.
AMD Embedded Development Framework (EDF) for the evaluation boards and their default boot modes.
Boot firmware loads from the primary flash device, selecting the design to load (
boot.bin), which is hosted on the same flash. The boot firmware provides image selection, secure A/B update, and recovery functionality. The primary boot device could contain only aboot.binif this functionality is not required in your custom design or during development.Operating systems are then loaded from the secondary flash device, which also hosts the root file systems.
The build flow has two parts: the primary boot device and the secondary boot device.
Set up Yocto prerequisites. See the Yocto Project Build Setup Instructions for EDF section above. Then source the environment to build using
bitbake:$ source edf-init-build-env
Build the
boot.binand EDF boot firmware if applicable. See EDF Common Specifications for the list of prebuilt machines that support generating aboot.binfile for evaluation boards. For custom designs and boards, theMACHINEis the customMACHINEcreated bygen-machine-conf:$ MACHINE=versal-2ve-2vm-vek385-multidomain bitbake edf-ospi
$ MACHINE=versal-vek280-multidomain bitbake edf-ospi
$ MACHINE=versal-vck190-multidomain bitbake edf-qspi
Build the EDF common disk images containing EDF Linux OS, using the correct
MACHINEfor your device family (Versal, MPSoC, and so on). See the EDF prebuilt Yocto machine definitions table for the predefined machines that ship with EDF.Syntax:
$ MACHINE=<machine-name> bitbake edf-linux-disk-image
For example:
$ MACHINE=amd-cortexa78-mali-common bitbake edf-linux-disk-image
$ MACHINE=amd-cortexa72-common bitbake edf-linux-disk-image
Check the output deploy directory:
$ ls -la tmp/deploy/images/versal-2ve-2vm-vek385-multidomain/
$ ls -la tmp/deploy/images/amd-cortexa78-mali-common/
$ ls -la tmp/deploy/images/versal-vek280-multidomain/ $ ls -la tmp/deploy/images/amd-cortexa72-common/
$ ls -la tmp/deploy/images/versal-vck190-multidomain/ $ ls -la tmp/deploy/images/amd-cortexa72-common/
Write to the flashes:
OSPI (boot firmware and
boot.pdi): System Controller,fwupdatetool, Vivado.SD card / UFS (common Linux image): BMAP, Balena Etcher,
dd, or System Controller for UFS.
Boot your board.
Creating a Bootable Single-stage Image (SD / eMMC / USB / UFS)
To boot from SD card or other single-stage boot sources (eMMC,
UFS, USB), the board-specific boot.bin (boot.pdi,
TF-A, U-Boot) needs to be added to the EDF Linux common
disk image.
See also
Common Specifications for the boot architecture and the files that go into an image.
AMD Embedded Development Framework (EDF) for the evaluation boards and their default boot modes.
Set up Yocto prerequisites. See the Yocto Project Build Setup Instructions for EDF section above.
Build the
boot.binusing predefined Yocto machines and provided recipes, with either prebuilt PDI artifacts (for an evaluation board) or a compile of a custom design. See the EDF prebuilt Yocto machine definitions table in the Common Specifications reference for the list of prebuilt machines that support generating aboot.binfile.Syntax:
$ MACHINE=<machine-name> bitbake xilinx-bootbin
For example:
$ MACHINE=versal-vek280-sdt-seg bitbake xilinx-bootbin
$ MACHINE=versal-vck190-sdt-seg bitbake xilinx-bootbin
$ MACHINE=versal-vpk120-sdt-seg bitbake xilinx-bootbin
$ MACHINE=versal-vpk180-sdt-seg bitbake xilinx-bootbin
$ MACHINE=versal-vmk180-sdt-seg bitbake xilinx-bootbin
$ MACHINE=zynqmp-zcu102-sdt-full bitbake xilinx-bootbin
$ MACHINE=zynqmp-zcu104-sdt-full bitbake xilinx-bootbin
$ MACHINE=zynqmp-zcu106-sdt-full bitbake xilinx-bootbin
Build the EDF common disk images containing EDF Linux OS, using the correct
MACHINEfor your device family (Versal, MPSoC, and so on). See the EDF prebuilt Yocto machine definitions table in the Common Specifications reference for Yocto machine definitions and supported recipes.Syntax:
$ MACHINE=<machine-name> bitbake edf-linux-disk-image
For example:
$ MACHINE=amd-cortexa72-common bitbake edf-linux-disk-image
$ MACHINE=amd-cortexa53-mali-common bitbake edf-linux-disk-image
Add the
boot.bin(created withxilinx-bootbin) to the EDF common disk image to make a single SD card image (boot.bin, kernel, rootfs, boot script). Add theboot.binto the EFI partition in the WIC image (partition 0, index 1 in the WIC).The flows below use the WIC tooling, which is available from within the Yocto build environment, but you may need to install additional packages not included in the Yocto setup.
wicusesmcopy, which is provided by themtoolspackage on Canonical Ubuntu:$ sudo apt install mtools
Other flows and tools can be used to update the
.tar.gzarchive version.Help for
wic:$ wic help
List the partition map of the
.wicfile:$ wic ls tmp/deploy/images/amd-cortexa72-common/edf-linux-disk-image-amd-cortexa72-common.rootfs.wic
$ wic ls tmp/deploy/images/amd-cortexa53-mali-common/edf-linux-disk-image-amd-cortexa53-mali-common.rootfs.wic
For the canonical partition layout (mount points, sizes, and filesystems), see EDF Disk Image Layout.
Show the contents of the EFI partition (index 1):
$ wic ls tmp/deploy/images/amd-cortexa72-common/edf-linux-disk-image-amd-cortexa72-common.rootfs.wic:1
Volume in drive : is esp
 Volume Serial Number is 8573-CFCD
Directory for ::/

efi          <DIR>     2011-04-05  23:00
image         32381440 2011-04-05  23:00  Image
loader       <DIR>     2011-04-05  23:00
xen      cfg       254 2011-04-05  23:00
xen      efi   1180456 2011-04-05  23:00
        5 files          33 562 150 bytes
                      1 037 914 112 bytes free
$ wic ls tmp/deploy/images/amd-cortexa53-mali-common/edf-linux-disk-image-amd-cortexa53-mali-common.rootfs.wic:1
Volume in drive : is esp
 Volume Serial Number is 0B04-E4DA
Directory for ::/

No files
                        535 797 760 bytes free
Copy the
boot.bininto the EFI partition of the.wicimage:$ wic cp \ tmp/deploy/images/versal-vek280-sdt-seg/boot.bin \ tmp/deploy/images/amd-cortexa72-common/edf-linux-disk-image-amd-cortexa72-common.rootfs.wic:1
$ wic cp \
    tmp/deploy/images/zynqmp-zcu104-sdt-full/boot.bin \
    tmp/deploy/images/amd-cortexa53-mali-common/edf-linux-disk-image-amd-cortexa53-mali-common.rootfs.wic:1
Check the contents of the
.wicimage:$ wic ls tmp/deploy/images/amd-cortexa72-common/edf-linux-disk-image-amd-cortexa72-common.rootfs.wic:1 Volume in drive : is esp Volume Serial Number is 8573-CFCD Directory for ::/ efi <DIR> 2011-04-05 23:00 image 32381440 2011-04-05 23:00 Image loader <DIR> 2011-04-05 23:00 xen cfg 254 2011-04-05 23:00 xen efi 1180456 2011-04-05 23:00 boot bin 3031696 2025-11-20 15:25 6 files 36 593 846 bytes 1 034 878 976 bytes free
$ wic ls tmp/deploy/images/amd-cortexa53-mali-common/edf-linux-disk-image-amd-cortexa53-mali-common.rootfs.wic:1
Volume in drive : is esp
 Volume Serial Number is 0B04-E4DA
Directory for ::/

boot     bin   1850460 2025-11-24  10:03
        1 file            1 850 460 bytes
                        533 946 368 bytes free
Flash the
.wicimage (or other updated image) to the SD card.